Wednesday, March 30, 2005
Permits!
I went to City Hall this morning and got the electrical and building permits required for the project. The electrical inspector was very friendly and interested in the project, saying he hoped he'd be the one doing the final inspection! I'd been dreading this, wondering what sort of hoops City Hall was going to make me jump through. Turns out it was a quite pleasant experience! I made the mistake, however, of reporting the full estimated cost of the project on the building permit application (for reroofing). The fee is based on the estimated cost, so if I'd estimated $9500 or so for reroofing, not including the electical stuff, I probably would have saved $40 or so on the permit. As it was, the building permit cost me $129 and the electrical permit $36.
Saturday, March 26, 2005
Installation Begun!
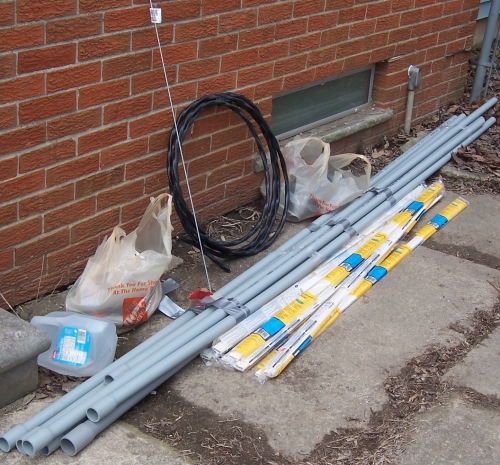
Rick, my handyman-helper, came over today and we got really started on the project. Rick surveyed the equipment and the furnace room in the basement and determined how much wire, conduit, and other hardware we'd need. We then went to Home Depot and bought the stuff--another $174.02.
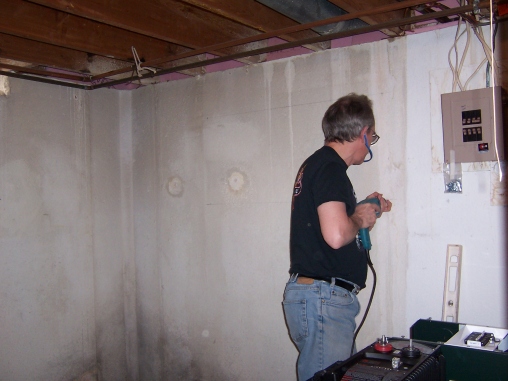
After we got back, Rick started drilling the holes for the mounting plate:
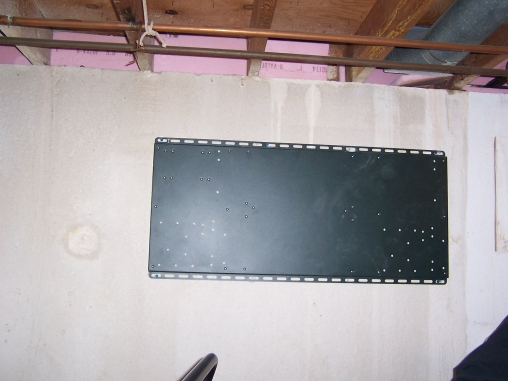
A short while later, the plate was in place:
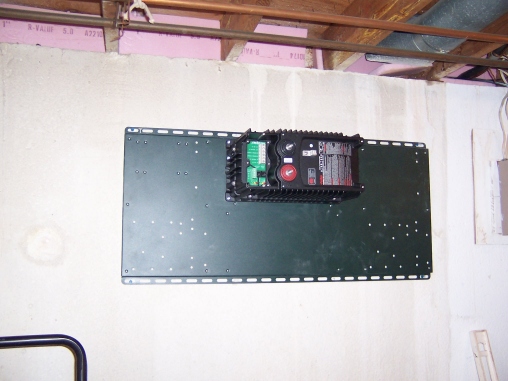
Next, we attached the inverter
the AC disconnect box,
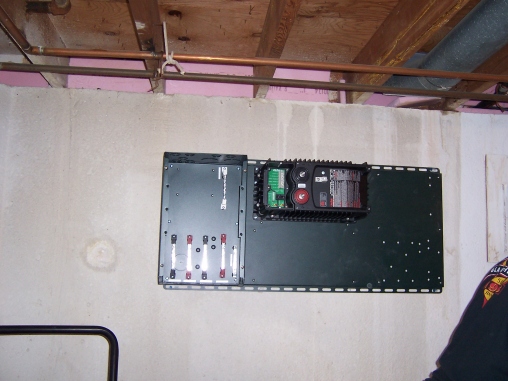
and the DC disconnect box.
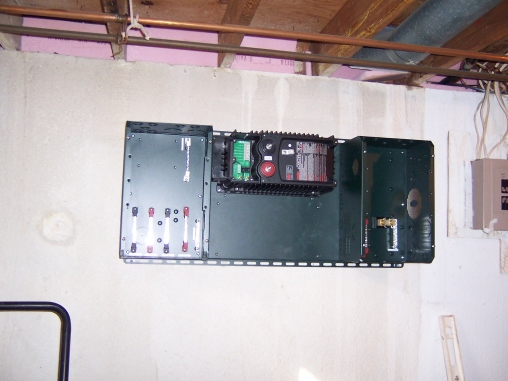
Unfortunately, the mounting plate is laid out so that the AC is on the left and the DC on the right, which is exactly opposite from what my basement layout calls for. The AC power center is at the right side of the wall, and the DC wires from the solar shingles will be coming from the left. All it really means is just a few extra feet of wire and conduit, and Rick has already figured out how he'll arrange it.
We were also able to run conduit from the basement to the attic inside an interior wall which separates two bedroom closets. Rick drilled holes in the first floor and the attic floor. I pushed the conduit up from the hole in the basement and Rick grabbed it in the attic and secured it. All of the shingle wiring in the attic will eventually lead to two wires carrying about 72 volts DC. These wires will feed through the conduit we ran today, and tie into the DC disconnect box on the panel, which will then link them through the charge controller to the batteries. The batteries will be connected back through the DC box to the inverter, which will be connected to the house wiring through the load center, and to the grid power as well.
The project is already showing that Kermit was right--it isn't easy being green! While going to solar power would seem pretty green, I've already had to bend a few of my principles. For starters, I normally prefer to avoid big-box stores like Home Depot in favor of local hardware stores, but it is unlikely that any local hardware store would have had all the stuff we needed, and it would have added on to this already very expensive project. Secondly, the conduit we bought is all PVC, which like pretty much every product made with chlorine is an environmental hazard both to make and to dispose of. Rick explained the trade-offs to me with PVC's competitor, metal conduit, which isn't perfect either, and is harder to work with. Rick's green credentials are excellent, so I went with his recommendation to use the PVC. Third, I am "financing" this project using 0% credit-card offers from Chase and Citi. I'd like to think that I'm sticking it to these evil corporations by borrowing their money interest-free, but in reality I'm probably sticking it to their less-fortunate customers who don't own houses or otherwise have my credit rating. The alternatives, however, were either waiting a while longer to do the solar project (continuing to pay DTE for coal- and nuclear-generated electricity), or cashing in several CD's at my credit union. Finally, I'd prefer to buy stuff that's made and sold locally, but I ended up buying all of the solar equipment from internet stores--in Massachusetts, New Mexico, and Arizona. My excuse there is pretty good--there's no store anywhere near here that sells any of this stuff. And both Outback and Uni-solar are American companies, and all of the Outback equipment is American made (the Uni-solar shingles are assembled in Mexico, even though the company's main factory is in Auburn Hills, Michigan, just 50 miles from here).
After we got back, Rick started drilling the holes for the mounting plate:
A short while later, the plate was in place:
Next, we attached the inverter
the AC disconnect box,
and the DC disconnect box.
Unfortunately, the mounting plate is laid out so that the AC is on the left and the DC on the right, which is exactly opposite from what my basement layout calls for. The AC power center is at the right side of the wall, and the DC wires from the solar shingles will be coming from the left. All it really means is just a few extra feet of wire and conduit, and Rick has already figured out how he'll arrange it.
We were also able to run conduit from the basement to the attic inside an interior wall which separates two bedroom closets. Rick drilled holes in the first floor and the attic floor. I pushed the conduit up from the hole in the basement and Rick grabbed it in the attic and secured it. All of the shingle wiring in the attic will eventually lead to two wires carrying about 72 volts DC. These wires will feed through the conduit we ran today, and tie into the DC disconnect box on the panel, which will then link them through the charge controller to the batteries. The batteries will be connected back through the DC box to the inverter, which will be connected to the house wiring through the load center, and to the grid power as well.
The project is already showing that Kermit was right--it isn't easy being green! While going to solar power would seem pretty green, I've already had to bend a few of my principles. For starters, I normally prefer to avoid big-box stores like Home Depot in favor of local hardware stores, but it is unlikely that any local hardware store would have had all the stuff we needed, and it would have added on to this already very expensive project. Secondly, the conduit we bought is all PVC, which like pretty much every product made with chlorine is an environmental hazard both to make and to dispose of. Rick explained the trade-offs to me with PVC's competitor, metal conduit, which isn't perfect either, and is harder to work with. Rick's green credentials are excellent, so I went with his recommendation to use the PVC. Third, I am "financing" this project using 0% credit-card offers from Chase and Citi. I'd like to think that I'm sticking it to these evil corporations by borrowing their money interest-free, but in reality I'm probably sticking it to their less-fortunate customers who don't own houses or otherwise have my credit rating. The alternatives, however, were either waiting a while longer to do the solar project (continuing to pay DTE for coal- and nuclear-generated electricity), or cashing in several CD's at my credit union. Finally, I'd prefer to buy stuff that's made and sold locally, but I ended up buying all of the solar equipment from internet stores--in Massachusetts, New Mexico, and Arizona. My excuse there is pretty good--there's no store anywhere near here that sells any of this stuff. And both Outback and Uni-solar are American companies, and all of the Outback equipment is American made (the Uni-solar shingles are assembled in Mexico, even though the company's main factory is in Auburn Hills, Michigan, just 50 miles from here).
Monday, March 21, 2005
Equipment Arrives!
All of the solar-power equipment that I ordered has now arrived. Here's a rundown:
80 Uni-Solar SHR-17 solar shingles, purchased from the Alternative Energy Store, Worcester, MA: $8685, including shipping.
From the Solar Panel Store, New Castle, CO:
The batteries cost me $300.
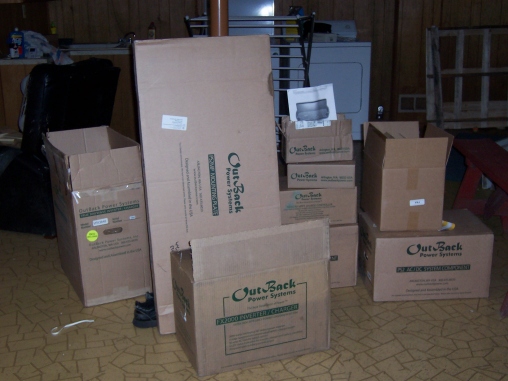
Here's all of the Outback equipment in the boxes...
And here it is unpacked:
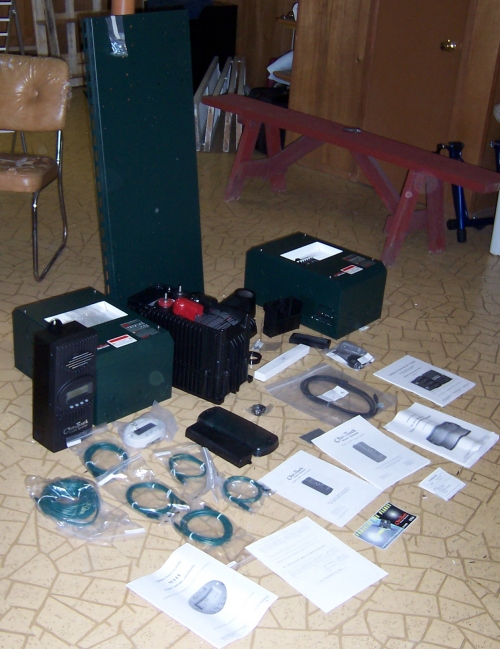
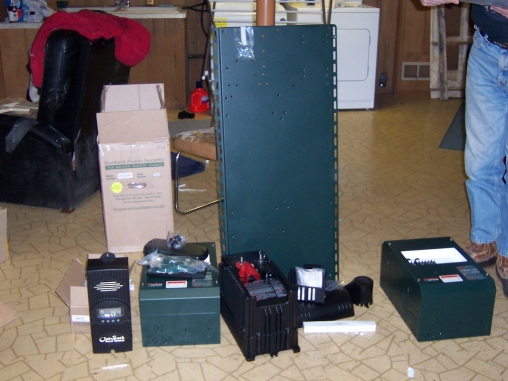
On the left is the charge controller; third from the left is the inverter. The two big boxes are the disconnect boxes (AC and DC), and the mounting plate is shown behind.
80 Uni-Solar SHR-17 solar shingles, purchased from the Alternative Energy Store, Worcester, MA: $8685, including shipping.
From the Solar Panel Store, New Castle, CO:
- Outback FX2548 Inverter, 49-volt DC to 120-volt AC, 2500 watt max. output: $1640
- Outback FXA Adapter Kit: $109.65
- Outback PS2MP mounting plate: $103.20
- Outback HUB-4 Communications Manager: $165.75
- Outback RTS Remote Temperature Sensor: $24.65
- Shipping for all above items: $70.20
- Outback MX60 Maximum Power Point Tracking Charge Controller: $499
- Outback PS2AC-50D AC disconnect box: $305
- Outback PS2DC-100 DC disconnect box: $260
- Outback Mate Remote Monitor and Control: $235
- Shipping for above items: $78.97
The batteries cost me $300.
Here's all of the Outback equipment in the boxes...
And here it is unpacked:
On the left is the charge controller; third from the left is the inverter. The two big boxes are the disconnect boxes (AC and DC), and the mounting plate is shown behind.
Monday, March 14, 2005
Remaining Solar Equipment Ordered
I ordered the electrical equipment for my solar project today from two different online dealers: Affordable Solar in Albuquerque, NM and Colorado Solar near Glenwood Springs, CO. (I wish I had known how close I was when I spent the night in Grand Junction back in December--I've never actually been in an alternative energy store.) Between them they had the best prices on the inverter, charge controller, computer control, and other devices that I needed for the project. I'll post an inventory of all of the stuff I've bought soon for anyone interested in knowing what you need and how much it costs.
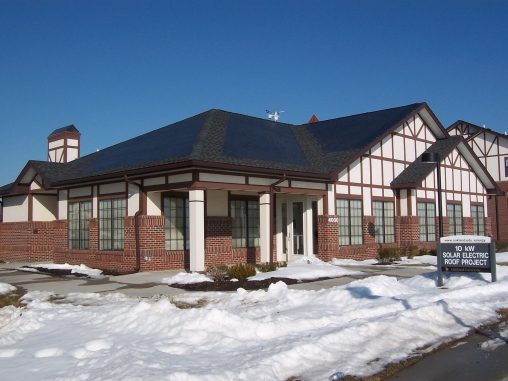
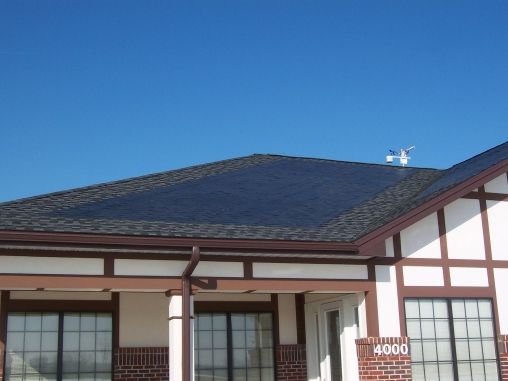
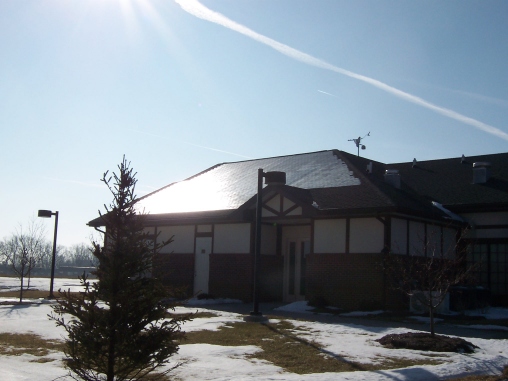
P-V Shingles in Action
A few weeks ago, I drove the 50 miles to Oakland University in Rochester, MI. They put Uni-solar photovoltaic shingles on the roof of an apartment community center back in 2003, and they've been generating power ever since. They've got a nice web site about the project, including links to daily power data. Here are some photos that I took of the shingles at Oakland U.:

Batteries!
My brother gave me a lead on a guy, Vern, who deals in used batteries. I drove up to Whitmore Lake yesterday to see what Vern had in stock, and it turned out that he had 18 6-volt sealed lead-acid batteries. I noted the model number, Best Power BAT-0050, and came back home and looked them up on the web. It turns out that they're 200 amp-hour batteries, comparable to the 225 a-h Trojan T-105 batteries that I was planning on buying, and the list price is about $190 each (the T-105's can be bought for about $75 plus about $10 each for shipping). Vern said they were one year old, and I could have them for $20 each! The bargain I was hoping for!
So I bought them all (he actually sold me all 18 for $300); they should perform at least adequately for my 48-volt system (I'll use the 16 best ones and keep the others as spares). I had to make two trips to Whitmore Lake to haul them all back--they weigh 70 pounds each and I didn't think my VW would handle them all at once. I lugged them all to the basement, checked their voltage with my multi-meter, and started charging the ones that were low. Here are some photos of the batteries:
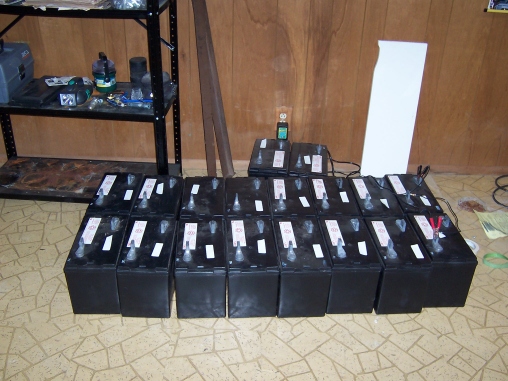
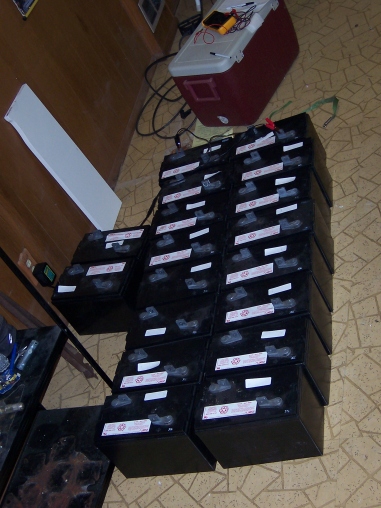

So I bought them all (he actually sold me all 18 for $300); they should perform at least adequately for my 48-volt system (I'll use the 16 best ones and keep the others as spares). I had to make two trips to Whitmore Lake to haul them all back--they weigh 70 pounds each and I didn't think my VW would handle them all at once. I lugged them all to the basement, checked their voltage with my multi-meter, and started charging the ones that were low. Here are some photos of the batteries:
Friday, March 11, 2005
Ordering the Equipment!
Yesterday, I ordered the 80 Uni-solar shingles from the Alternative Energy Store in Massachusetts. The shingles are rated at 17 watts each, for a total nominal solar power rating of 1360 watts. The shingles will be installed on my south-facing front roof. Each shingle has two wires which will pass through 1-inch holes in the roof base. They will be wired in series strings of 8, which will then be linked in parallel to two wires carrying approximately 72 volts.
The wires from the shingles will run through conduit from my attic to my basement, where they will connect with an Outback MX60 charge controller.
The charge controller regulates the voltage to the batteries, enabling quick charging and protecting them from overcharging. The MX60 allows for input voltages substantially higher than the battery voltage--the 72 volts from the shingles will be charging a 48-volt battery bank.
The batteries will power an inverter, the Outback FX2548, which converts 48-v DC power into 120-v AC. This will then be connected to my household breaker panel, providing power to my household outlets. The inverter will also be connected to the grid so that when the batteries are low I will be able to switch to grid power. When this happens, the inverter doubles as a battery charger, allowing me to recharge the batteries while running my house from the grid. Hopefully this won't be necessary too often--probably just a few long, cold winter nights each year.
The Alternative Energy Store is putting together a bid for me to combine all of the various Outback devices--charge controller, inverter, system monitor and control, and a variety of connectors, breakers and disconnects--onto a single pre-assembled panel. Whether I go with this method or order the parts separately will depend on the relative cost and the advice of my electrical specialist, Rick.
Batteries are my biggest remaining wildcard. Batteries are expensive, heavy, and require periodic maintenance (unless you go for much more expensive). I'm torn between buying lots of batteries, enough to get me through five days without sun, or economizing and relying on the grid when the going gets cloudy. I'm going to check with a few people to see if I can get a good deal on some slightly-used batteries.
Anyway, I'll be posting photos and updates on my progress on this blog from time to time. If you have questions, you can leave comments here or e-mail me.
Tuesday, March 08, 2005
My solar project blog!
I'm installing a solar-electric system in my house this year, and I'll be tracking the progress here.
![]()