Thursday, June 30, 2005
Connecting the wires
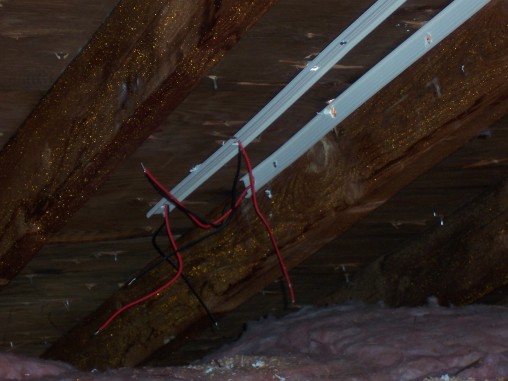
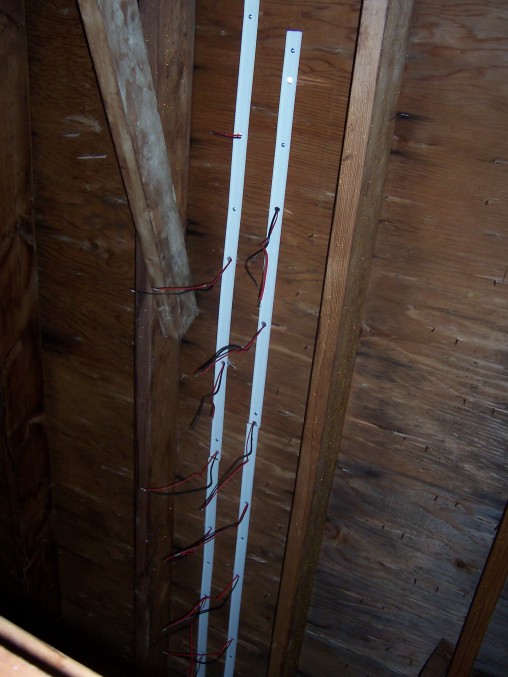
Perhaps you've been wondering what a heat-shrink butt splice looks like up close. Well, here it is!
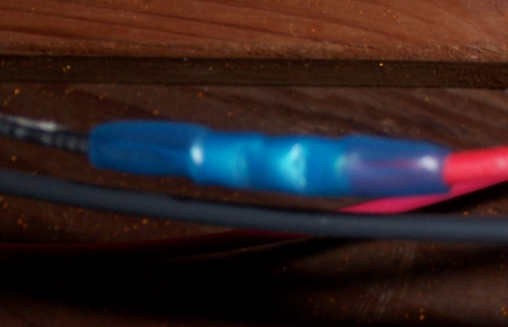
The stripped ends of the wires are inserted into the inner metal sleeve of the splice, which is then crimped down on the wire to hold it securely in place and to provide the electrical connection. When both ends are connected, a heat gun is used to shrink the plastic cover securely around the metal and the wires, keeping dirt and moisture out.
I've made 100 of these connections between the shingles and to connect the shingle strings to the wires which eventually lead to the basement and the charge controller.


I got a few of them wrong, as we discovered last night. I'll fix them tonight. I'm also expecting to receive a replacement "Mate" from Outback. The Mate is the computer which communicates with and controls the inverter and the charge controller, monitoring the system. The one I had purchased apparently has a defective clock. I called Outback's customer service on Tuesday, and by telling me to push a few buttons they were able to confirm that the Mate was defective. They said they would send me a new one right away--hopefully it will be there when I get home. One the remaining connections are fixed, the system should be fully operational, with only a bit of final conduit work and other niceties left. Once these are done, we can call the inspector and hopefully get a final sign-off on the project!
The stripped ends of the wires are inserted into the inner metal sleeve of the splice, which is then crimped down on the wire to hold it securely in place and to provide the electrical connection. When both ends are connected, a heat gun is used to shrink the plastic cover securely around the metal and the wires, keeping dirt and moisture out.
I've made 100 of these connections between the shingles and to connect the shingle strings to the wires which eventually lead to the basement and the charge controller.
I got a few of them wrong, as we discovered last night. I'll fix them tonight. I'm also expecting to receive a replacement "Mate" from Outback. The Mate is the computer which communicates with and controls the inverter and the charge controller, monitoring the system. The one I had purchased apparently has a defective clock. I called Outback's customer service on Tuesday, and by telling me to push a few buttons they were able to confirm that the Mate was defective. They said they would send me a new one right away--hopefully it will be there when I get home. One the remaining connections are fixed, the system should be fully operational, with only a bit of final conduit work and other niceties left. Once these are done, we can call the inspector and hopefully get a final sign-off on the project!
Saturday, June 25, 2005
All-nighter--Almost Finished!
Last night, Rick and I started working in the attic (yes, this time I did more than just take pictures) at about 9 pm and worked until about 6 am. We worked at night because it has been brutally hot here lately, with outside temperatures in the 90's and attic temperatures much higher than that. It also was safer since the shingles weren't producing any significant voltage or current. We worked ALL night because Rick heads off to vacation today, and we were trying to finish the project.
We got very close, but ran out of a few key supplies and time. We did get the system running in a reduced fashion, which was very rewarding in itself--we know the stuff works!
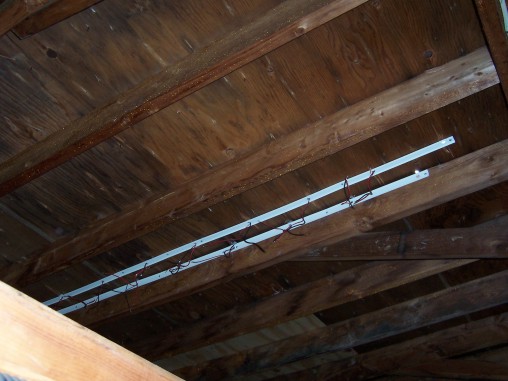
Rick spent most of the night working on the larger-scale wiring--the wires and conduit which tie the twelve series strings of shingles into the two big 4-gauge wires which take the power to the basement and ultimately the house. Here he is sorting out the wires for three of the strings:
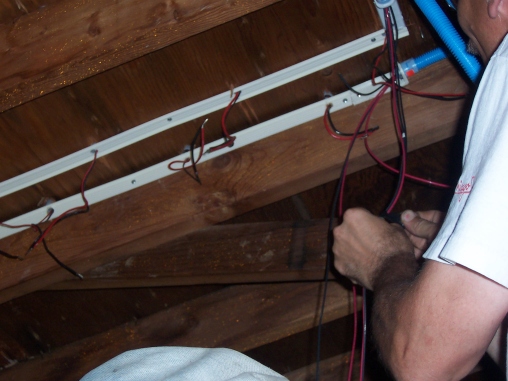
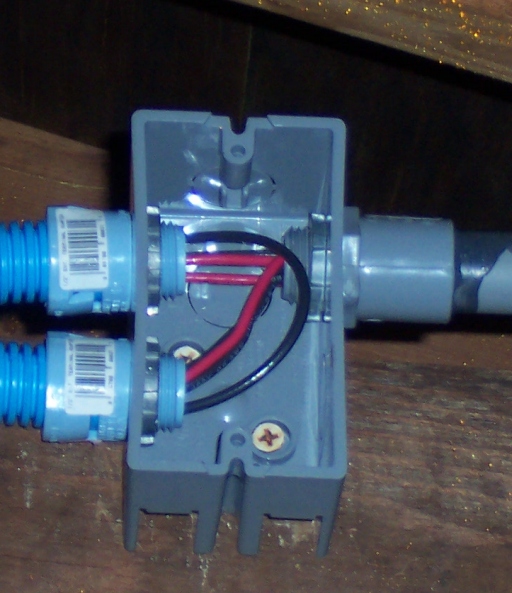
The 84 shingles were laid out in 21 rows, four across. Alternate rows were slightly offset, which meant that the wires in the attic were offset as well. The wires were arranged in 8 plastic "raceways," grouped in four pairs. Each raceway pair contains the wires for 21 shingles--11 in one raceway and 10 in the other. Electrically, however, the shingles are grouped in sevens. To make this work, we linked the bottom seven shingles in each raceway together, and then the top four in one raceway with the top three in its adjacent raceway, yielding three series strings from each pair of raceways. The wires from the three strings were combined into two lengths of flexible conduit:
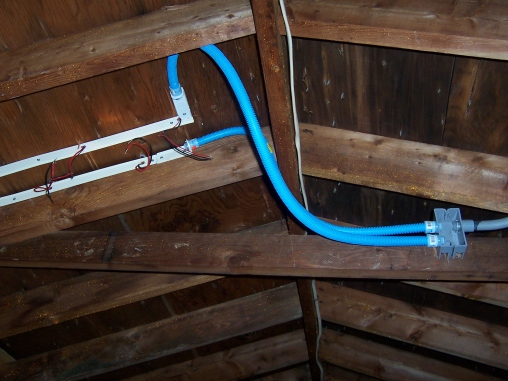
This conduit ties to a junction box, which serves to funnel the wire into rigid conduit which runs to the combiner box (above). The junction box also allows the series string formed by four shingles on one side and three on the other to be tied together--note the black wire which loops from one conduit run to the other.
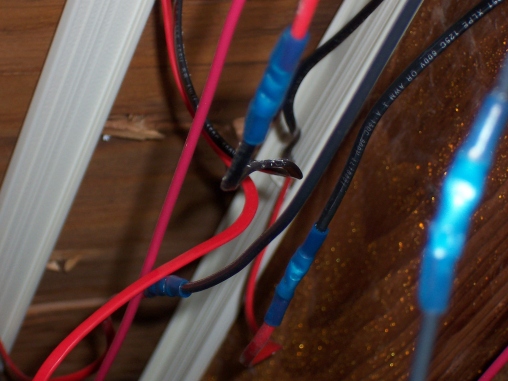
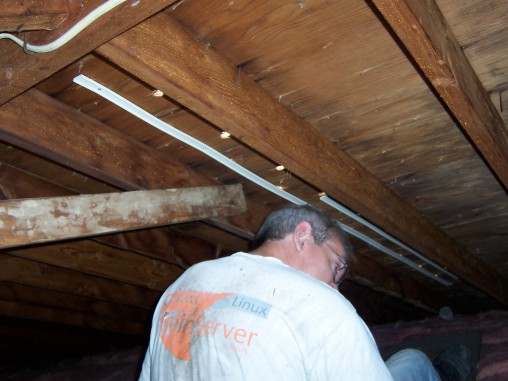
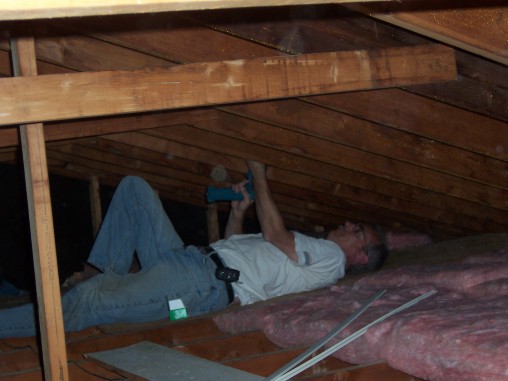
While Rick was doing this macro wiring, I spent much of the night doing the micro wiring--splicing the individual shingles together, and then splicing them into Rick's macro wiring. Unisolar's instructions call for using heat-shrink butt-end splices. This is an excellent way of joining two wires electrically, according to Rick, but it's also a pain in the butt (and the knees and the neck, etc.) to do in tight, poorly lit spaces. Here I am in one of my many stress positions:
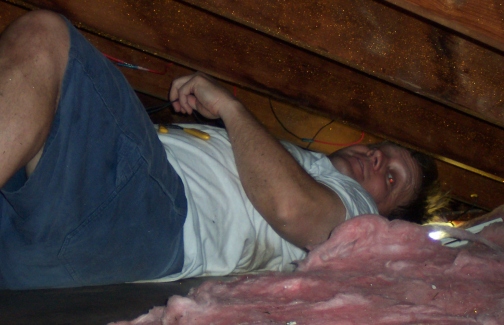
No, it's not as comfortable as it looks. Here's what I was doing with my face ten inches from the underside of the roof: First, I would find the two wires I needed to join, and make sure the ends were properly stripped (about 1/4 inch). I had a wirecutter/stripper tool resting on my belly which I used when the wires needed cutting or stripping. Next, I would grab one of the little butt splices and insert one of the wires into one end. I would then grab the crimping tool, also resting on my belly, and crimp the wire securely into the splice. I would then insert the other wire in the other end of the splice and crimp it. I got pretty good at this after a while, but then started to regress as it got to be 5 in the morning and I could no longer see or think straight. We had exactly enough splices IF I didn't screw any up. But I did, starting with the second one, and ended up maybe 15 splices short. I also managed at some point in the night to join two wires which shouldn't have been joined, which I'll need to fix later.
Nevertheless, between Rick's macro wiring and my micro wiring, we were able to get 5 of the eventual 12 series strings fully connected to the system. This meant we were able to power up the system and see what we're getting.
Here's a view of the Mate system controller's display at about 10:30 this morning, when the roof was getting pretty good sun:
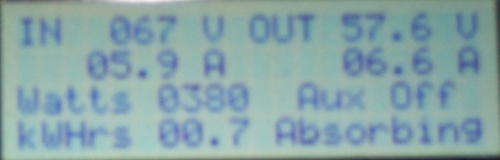
67 volts in, 5.9 amps, for a total of 380 watts. This means we would have about 912 watts if all 12 series strings were online. The rated power for the array is 1428 watts (17 times 84), which would only happen when the sun's rays were directly perpendicular to the roof (which I'll get close to during the summer, but not at 10:30). So it appears that the shingles are performing pretty much as promised!
Unfortunately, about 11:30 this morning I started to hear gurgling noises from the batteries, meaning they were probably being overcharged (Rick and I must have entered the wrong settings on the charge controller, something we probably shouldn't have been doing at 7 in the morning with no sleep). I immediately flipped the switch connecting the solar array to the charge controller off. Hopefully the batteries haven't been damaged. Since they are used, the batteries are the weak link in the system--I was thinking I might need to upgrade them at some point. Hopefully that point isn't now!
I went out and bought the additional butt splices I need, and will head up to the attic and finish the micro wiring some evening in the near future (not tonight, though--I need some sleep!). I'll wait to hear from Rick (during or after his vacation) before I try to turn the system on again, so for now I've got an almost complete, almost working solar-power system, but I'm still running off the grid (and my two 12-V Evergreen solar panels I bought last year).
We got very close, but ran out of a few key supplies and time. We did get the system running in a reduced fashion, which was very rewarding in itself--we know the stuff works!
Rick spent most of the night working on the larger-scale wiring--the wires and conduit which tie the twelve series strings of shingles into the two big 4-gauge wires which take the power to the basement and ultimately the house. Here he is sorting out the wires for three of the strings:
The 84 shingles were laid out in 21 rows, four across. Alternate rows were slightly offset, which meant that the wires in the attic were offset as well. The wires were arranged in 8 plastic "raceways," grouped in four pairs. Each raceway pair contains the wires for 21 shingles--11 in one raceway and 10 in the other. Electrically, however, the shingles are grouped in sevens. To make this work, we linked the bottom seven shingles in each raceway together, and then the top four in one raceway with the top three in its adjacent raceway, yielding three series strings from each pair of raceways. The wires from the three strings were combined into two lengths of flexible conduit:
This conduit ties to a junction box, which serves to funnel the wire into rigid conduit which runs to the combiner box (above). The junction box also allows the series string formed by four shingles on one side and three on the other to be tied together--note the black wire which loops from one conduit run to the other.
While Rick was doing this macro wiring, I spent much of the night doing the micro wiring--splicing the individual shingles together, and then splicing them into Rick's macro wiring. Unisolar's instructions call for using heat-shrink butt-end splices. This is an excellent way of joining two wires electrically, according to Rick, but it's also a pain in the butt (and the knees and the neck, etc.) to do in tight, poorly lit spaces. Here I am in one of my many stress positions:
No, it's not as comfortable as it looks. Here's what I was doing with my face ten inches from the underside of the roof: First, I would find the two wires I needed to join, and make sure the ends were properly stripped (about 1/4 inch). I had a wirecutter/stripper tool resting on my belly which I used when the wires needed cutting or stripping. Next, I would grab one of the little butt splices and insert one of the wires into one end. I would then grab the crimping tool, also resting on my belly, and crimp the wire securely into the splice. I would then insert the other wire in the other end of the splice and crimp it. I got pretty good at this after a while, but then started to regress as it got to be 5 in the morning and I could no longer see or think straight. We had exactly enough splices IF I didn't screw any up. But I did, starting with the second one, and ended up maybe 15 splices short. I also managed at some point in the night to join two wires which shouldn't have been joined, which I'll need to fix later.
Nevertheless, between Rick's macro wiring and my micro wiring, we were able to get 5 of the eventual 12 series strings fully connected to the system. This meant we were able to power up the system and see what we're getting.
Here's a view of the Mate system controller's display at about 10:30 this morning, when the roof was getting pretty good sun:
67 volts in, 5.9 amps, for a total of 380 watts. This means we would have about 912 watts if all 12 series strings were online. The rated power for the array is 1428 watts (17 times 84), which would only happen when the sun's rays were directly perpendicular to the roof (which I'll get close to during the summer, but not at 10:30). So it appears that the shingles are performing pretty much as promised!
Unfortunately, about 11:30 this morning I started to hear gurgling noises from the batteries, meaning they were probably being overcharged (Rick and I must have entered the wrong settings on the charge controller, something we probably shouldn't have been doing at 7 in the morning with no sleep). I immediately flipped the switch connecting the solar array to the charge controller off. Hopefully the batteries haven't been damaged. Since they are used, the batteries are the weak link in the system--I was thinking I might need to upgrade them at some point. Hopefully that point isn't now!
I went out and bought the additional butt splices I need, and will head up to the attic and finish the micro wiring some evening in the near future (not tonight, though--I need some sleep!). I'll wait to hear from Rick (during or after his vacation) before I try to turn the system on again, so for now I've got an almost complete, almost working solar-power system, but I'm still running off the grid (and my two 12-V Evergreen solar panels I bought last year).
Friday, June 24, 2005
Starting the attic wiring
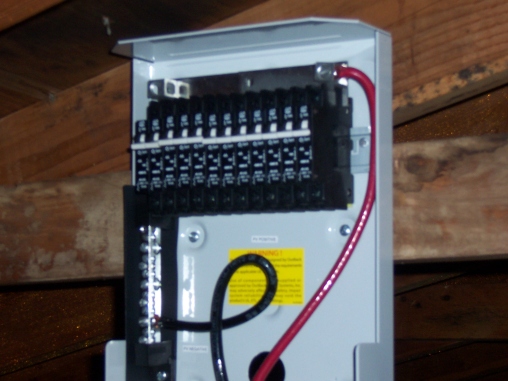
Rick installed the Outback combiner box in the attic, which will serve as the meeting place for the wires coming from the 12 strings of seven shingles:
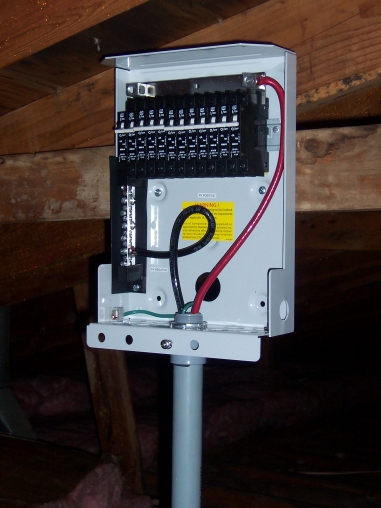
The combiner box contains the 4-amp breakers I had to special order from Virginia, and which arrived on Wednesday six weeks after I ordered them (as promised). The breakers guarantee that if one of the shingle series strings produces too much current, the breaker will trip and protect the rest of the system down the line.
The combiner box contains the 4-amp breakers I had to special order from Virginia, and which arrived on Wednesday six weeks after I ordered them (as promised). The breakers guarantee that if one of the shingle series strings produces too much current, the breaker will trip and protect the rest of the system down the line.
Tuesday, June 21, 2005
One function working!
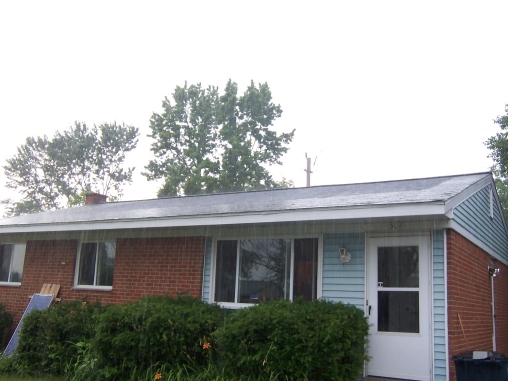
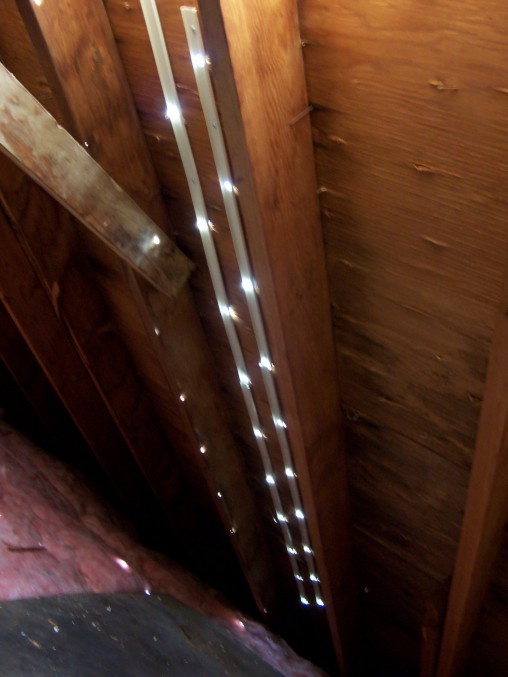
It rained on Tuesday, and the new roof, solar shingles and all, did its job:
Friday, June 17, 2005
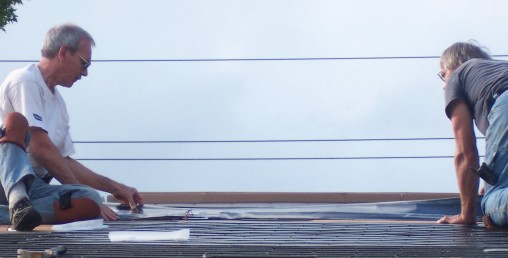
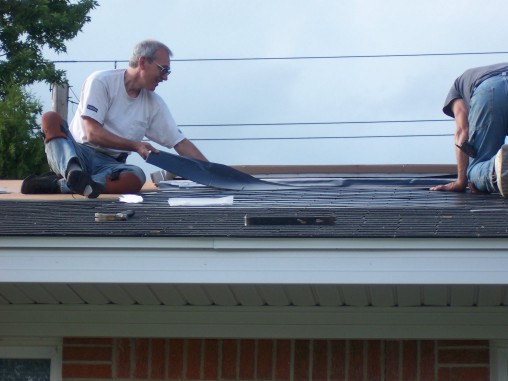
Solar shingles installed!
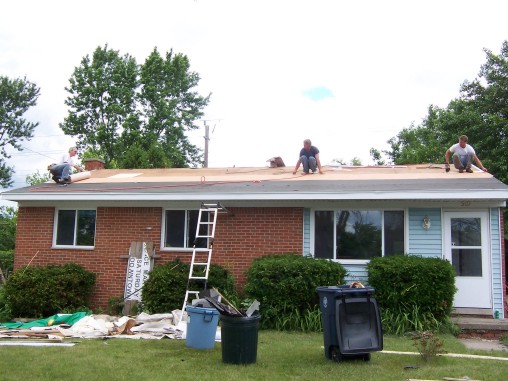
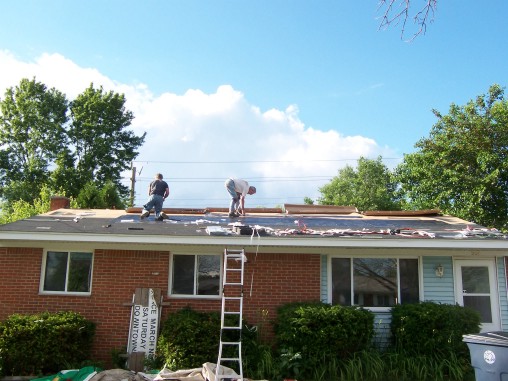
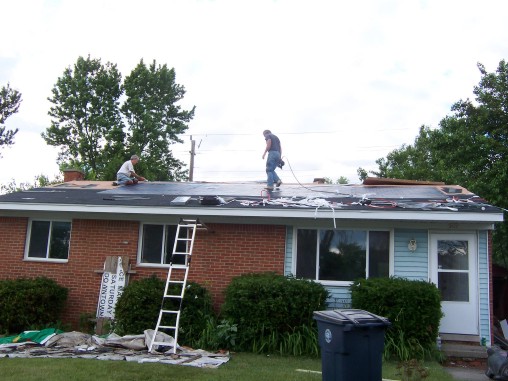
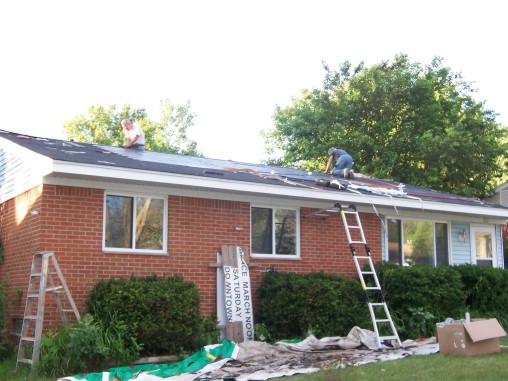
Yesterday, Rick, Lee and Zach stripped my old south-facing roof and replaced it with a new, solar-powered roof! While the weather forecast said there might be thunderstorms in the afternoon, the weather stayed dry and pleasantly cool throughout the day. While there's still some wiring to do and a few parts on order that haven't come in yet, the project now feels very close to completion!
At 7:30 in the morning, the house didn't know what was about to hit it...
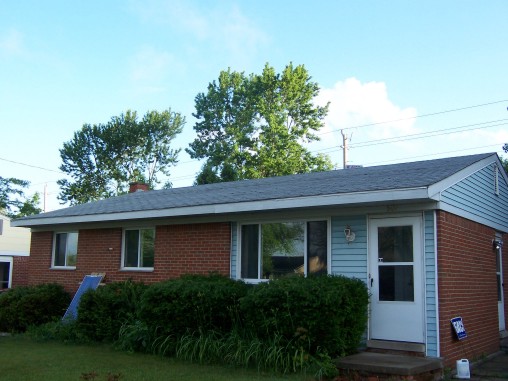
Although the stacks of roofing materials on the back side might have been a clue.

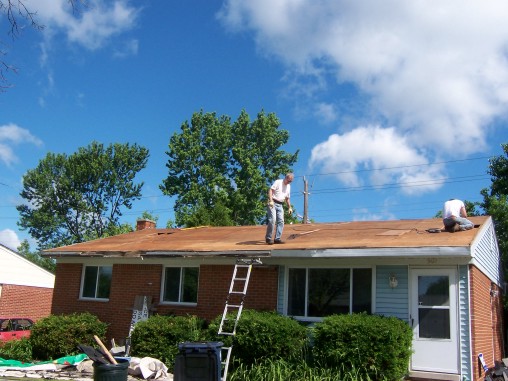
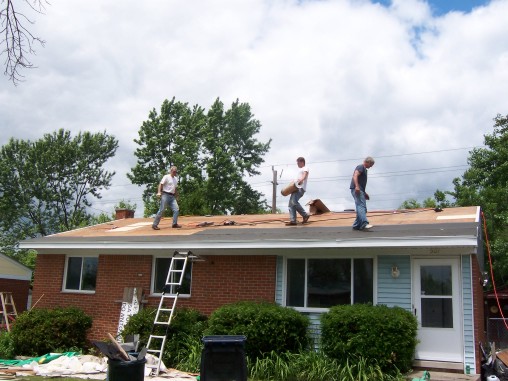
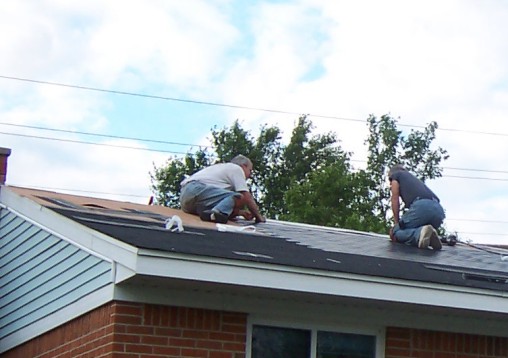
Once the team arrived--Rick, Lee and Zach--they went quickly to work stripping the old roof from the south side of the house.
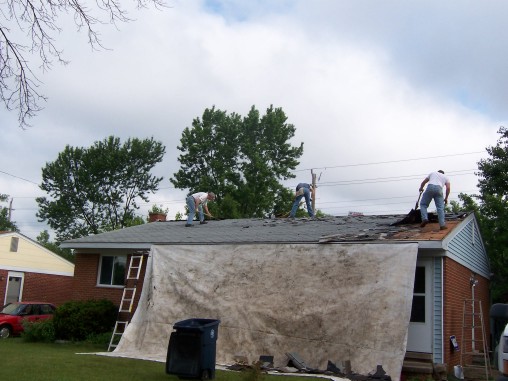
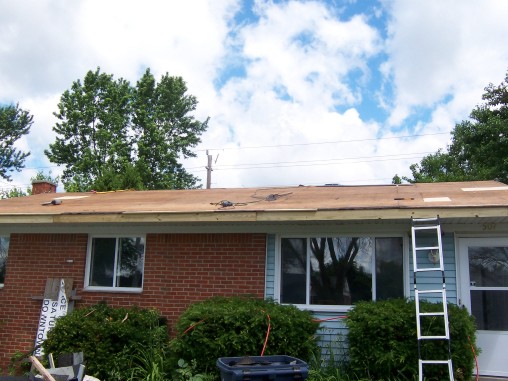
Soon, the roof was stripped bare.
Hidden defects, including a rotten fascia board, had been exposed.
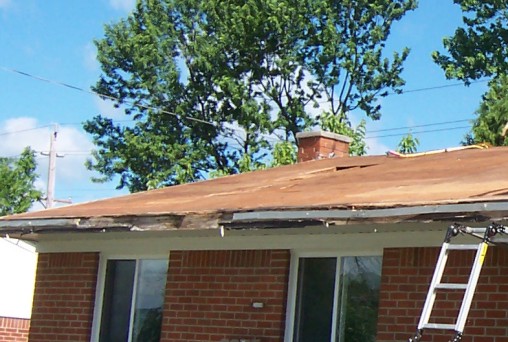
By the time the crew left for lunch, these had all been repaired.
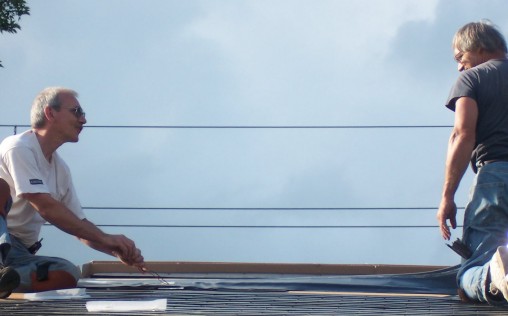
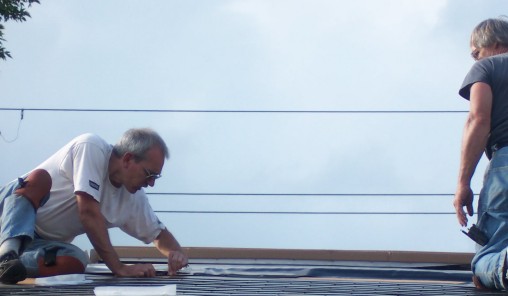
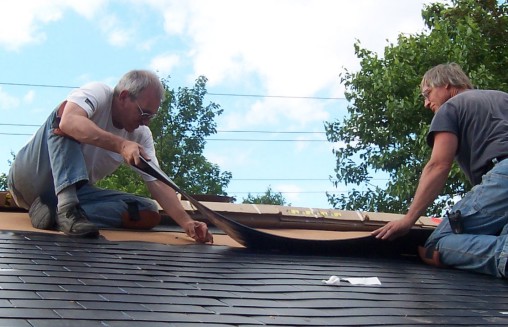
Putting down the ice-guard underlayment on the bottom part of the roof was next.
Followed by the Elk Versashield fire-resistant underlayment recommended by Uni-solar for use under the solar shingles.
Ordinary asphalt shingles were installed starting at the bottom.
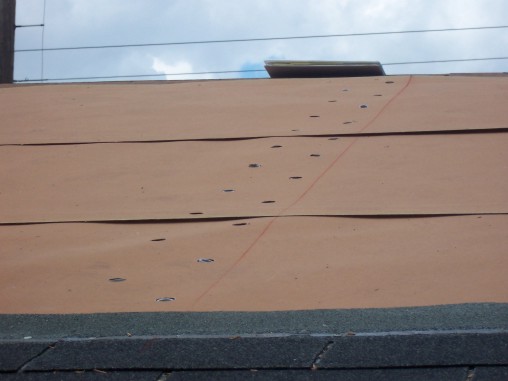
Holes were drilled in the top half, using a template. The holes were for the wires from the Uni-solar shingles to pass through into the attic. A 3/8-inch length of 1/2 inch PVC conduit lines each hole.
Inside the attic, the holes are temporarily covered by the channel portion of some electrical raceway.
Rick had to work in some tight quarters to install the raceway. Fortunately, it was not hot in the attic.
Once the raceway was in place, 1/2 inch holes were drilled through it to allow the wires to pass. (The PVC conduit lining the holes was placed after these holes were drilled.)
The spacing of the solar shingles was carefully determined (Uni-solar has fairly elaborate instructions for doing this).
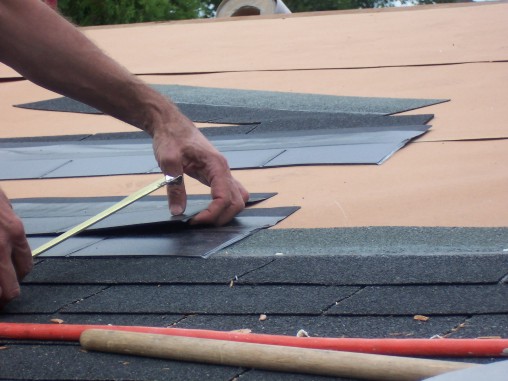
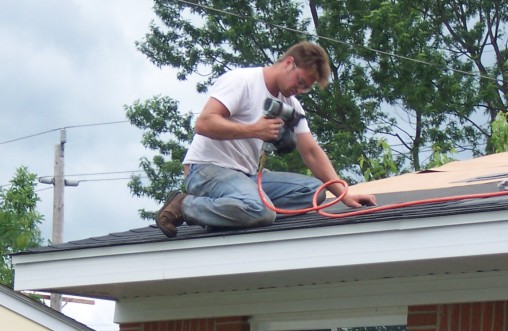
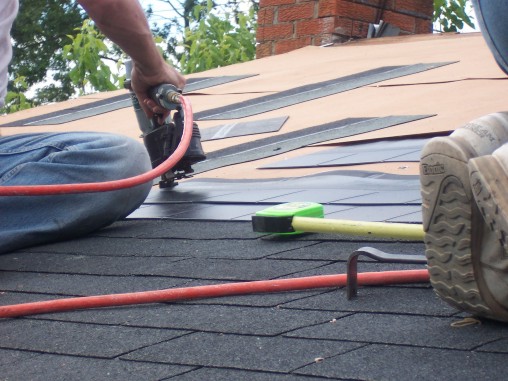
The solar shingles are nailed in place!
As the shingles are installed on top, wires begin to appear in the attic.
After the first couple of rows, installing the shingles went relatively quickly.

The details of laying a solar shingle: First, short the wire leads by twisting them together (the short-circuit current from each shingle is small enough that this isn't a problem).
Next, feed the wires through the hole.
Line up the shingle.
And lay it into place, making sure the wires go all the way through.
Fourteen of the 21 rows of solar shingles in place.
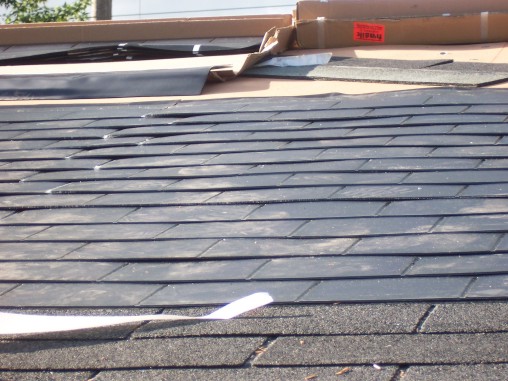
Most of the holes have wires coming through them now!
Placing the last row of solar shingles.
And the last shingle!
The remainder of the roof was covered with conventional shingles, the roof cap was installed, and Rick and Lee did a few additional repairs and finishing touches, finally finishing after 9 pm. The weather was nearly perfect throughout.
At 7:30 in the morning, the house didn't know what was about to hit it...
Although the stacks of roofing materials on the back side might have been a clue.
Once the team arrived--Rick, Lee and Zach--they went quickly to work stripping the old roof from the south side of the house.
Soon, the roof was stripped bare.
Hidden defects, including a rotten fascia board, had been exposed.
By the time the crew left for lunch, these had all been repaired.
Putting down the ice-guard underlayment on the bottom part of the roof was next.
Followed by the Elk Versashield fire-resistant underlayment recommended by Uni-solar for use under the solar shingles.
Ordinary asphalt shingles were installed starting at the bottom.
Holes were drilled in the top half, using a template. The holes were for the wires from the Uni-solar shingles to pass through into the attic. A 3/8-inch length of 1/2 inch PVC conduit lines each hole.
Inside the attic, the holes are temporarily covered by the channel portion of some electrical raceway.
Rick had to work in some tight quarters to install the raceway. Fortunately, it was not hot in the attic.
Once the raceway was in place, 1/2 inch holes were drilled through it to allow the wires to pass. (The PVC conduit lining the holes was placed after these holes were drilled.)
The spacing of the solar shingles was carefully determined (Uni-solar has fairly elaborate instructions for doing this).
The solar shingles are nailed in place!
As the shingles are installed on top, wires begin to appear in the attic.
After the first couple of rows, installing the shingles went relatively quickly.
The details of laying a solar shingle: First, short the wire leads by twisting them together (the short-circuit current from each shingle is small enough that this isn't a problem).
Next, feed the wires through the hole.
Line up the shingle.
And lay it into place, making sure the wires go all the way through.
Fourteen of the 21 rows of solar shingles in place.
Most of the holes have wires coming through them now!
Placing the last row of solar shingles.
And the last shingle!
The remainder of the roof was covered with conventional shingles, the roof cap was installed, and Rick and Lee did a few additional repairs and finishing touches, finally finishing after 9 pm. The weather was nearly perfect throughout.
Friday, June 10, 2005
Getting close to the end!
Sorry I've taken so long to update this site. Rick has done a lot of wiring work since April 20, and we're ready to put the shingles up next week! Here's what has been happening in the past several weeks.
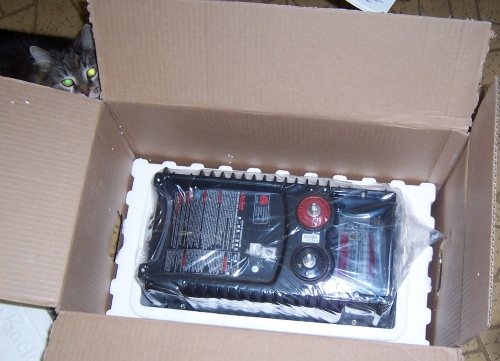
First, I forgot to mention that the system components had to be inspected. My cat Ragu inspected the inverter,
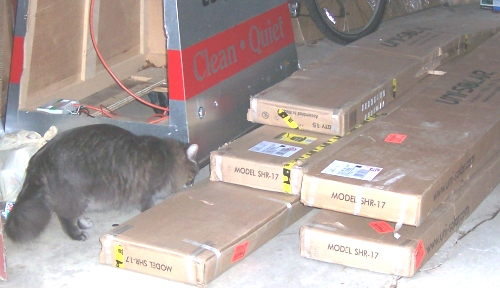
while Marcos checked out the solar shingles.
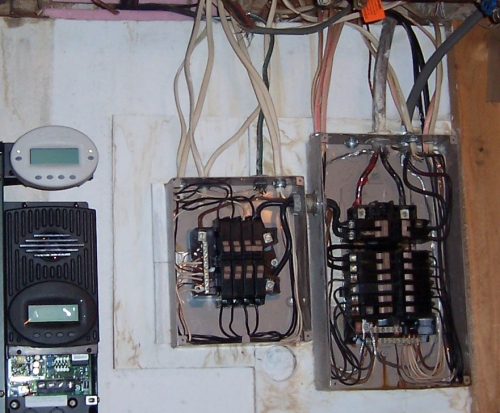
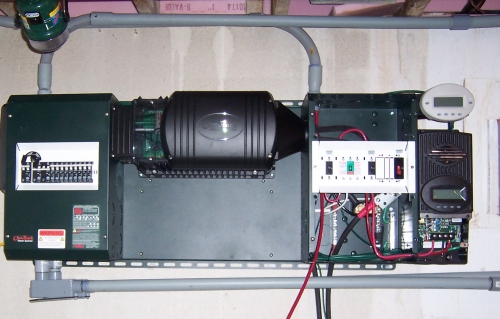
After the major system components were installed, Rick did a lot of work with the AC wiring. I currently don't have any 220-volt loads. If I did, they would have to run directly off of the grid, since I only bought one 120-V inverter. So Rick put the 220 breakers into the original power panel, and split the 110 breakers between the auxiliary panel that was installed when the house was added on to (before I bought it--center of picture below), and the new AC panel that is part of the Outback system.
Rick also replaced the service-entry cable, since the old one had cracked insulation which was letting water in (never a good thing in electrical systems!).
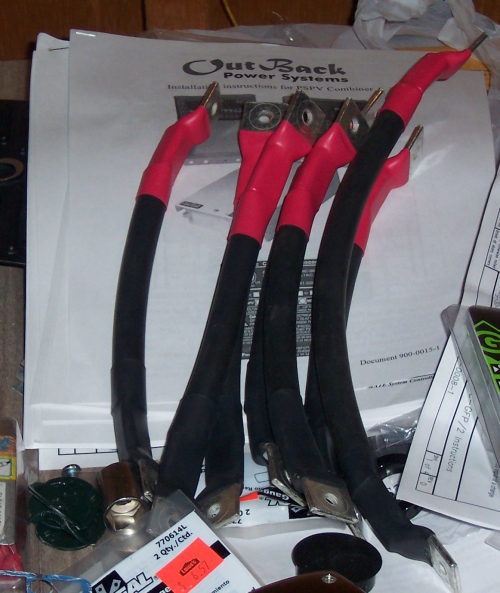
This week, Rick worked on the DC side. Using 880 pumps on a crimping tool he borrowed from McNaughton-McKay Electrical, he attached lugs to the battery cables:
He also ran the 4ga DC wires through the conduit from the basement to the attic.
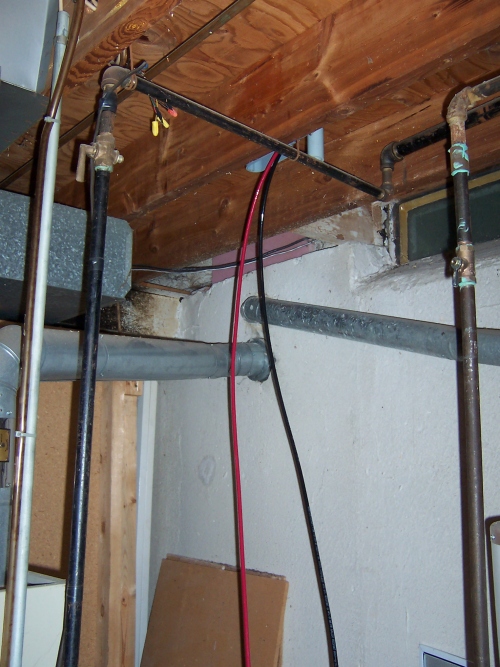
The basement wiring is now just about complete.
Next week, probably Thursday, we will strip the old roof (south-facing side only) and install a new one comprised of 84 Unisolar PV shingles and enough ordinary shingles to cover the rest. We will be using Elk Versashield underlayment under the solar shingles as recommended by Unisolar.
Once the shingles are in place, we'll have to wire them up in the attic and connect them to the rest of the system. I'm still waiting on some 4-amp DC breakers I ordered from Virginia; hopefully they will arrive before we're finished with everything else. After that, we should be able to turn the system on!
Once we're done, I'll tally up all of the materials and costs of the project. (Guess what--it's costing me more than I estimated!) After that will come what should be the most fun part of this web site--tracking the performance of the system.
First, I forgot to mention that the system components had to be inspected. My cat Ragu inspected the inverter,
while Marcos checked out the solar shingles.
After the major system components were installed, Rick did a lot of work with the AC wiring. I currently don't have any 220-volt loads. If I did, they would have to run directly off of the grid, since I only bought one 120-V inverter. So Rick put the 220 breakers into the original power panel, and split the 110 breakers between the auxiliary panel that was installed when the house was added on to (before I bought it--center of picture below), and the new AC panel that is part of the Outback system.
Rick also replaced the service-entry cable, since the old one had cracked insulation which was letting water in (never a good thing in electrical systems!).
This week, Rick worked on the DC side. Using 880 pumps on a crimping tool he borrowed from McNaughton-McKay Electrical, he attached lugs to the battery cables:
He also ran the 4ga DC wires through the conduit from the basement to the attic.
The basement wiring is now just about complete.
Next week, probably Thursday, we will strip the old roof (south-facing side only) and install a new one comprised of 84 Unisolar PV shingles and enough ordinary shingles to cover the rest. We will be using Elk Versashield underlayment under the solar shingles as recommended by Unisolar.
Once the shingles are in place, we'll have to wire them up in the attic and connect them to the rest of the system. I'm still waiting on some 4-amp DC breakers I ordered from Virginia; hopefully they will arrive before we're finished with everything else. After that, we should be able to turn the system on!
Once we're done, I'll tally up all of the materials and costs of the project. (Guess what--it's costing me more than I estimated!) After that will come what should be the most fun part of this web site--tracking the performance of the system.
![]()