Lesson 1
Image size, resolution, and mode
 When you first open Photoshop, you should have a blank working space with various menus, as in the image (right). The displayed menus and their locations are customizable, so your screen may look slightly different, but in general it should have a similar overall appearance.
First, take a look at the menu bar that runs horizontally across the top of the screen.

There are various ways to acquire an image with which to begin working. You can create a new file, open an existing file saved on your computer's hard drive or a data disk, or import an image from an attached device such as a scanner. I will talk about each of these methods in turn.
To open a new file, click on the first item on the menu, "File." You should see a pull-down menu.
Many commands can be activated by using combinations of keystrokes rather than relying on the mouse. Depending on the situation, these keyboard shortcuts may save time. It is a good idea to remember the shortcut combinations for the commands you use most often.
To see the File menu, press the Alt and F keys simultaneously, indicated by the shorthand Alt + F.
 Once the pull-down File menu is open, you can see that the first list item is "New," which creates a new, blank image. Click on "New" to bring up the corresponding dialogue box. The shortcut for opening a new image is Ctrl + N.
 You should see a dialogue box similar to the one on the right. This dialogue box determines the properties of the new image. You can simply press the Enter key or click the "OK" button to open an image with the default settings and then change the settings later if required, but it is more convenient to be able to enter the correct settings right from the start.
In the "Name" field, you can enter a name for the image. If you don't know yet what you want to call your image, you can leave this untitled and give it a name later when you save your work.
The next section deals with the size of the image. You can manually enter values for the width and height, choosing from a selection of different units, including pixels, millimeters, and inches.
Below the width and height fields is a place to enter the desired resolution. The images you work with in Photoshop are composed of pixels, or "dots," and the resolution determines how many of these dots will be assigned per inch of the image. Resolution is usually measured in "dots per inch" or "d.p.i." The higher the resolution, the clearer and more detailed the image will be. However, images at high resolution also take up more memory, since the computer has more pixel information to store.
It is important to choose the resolution best suited for your purpose. It is far easier to take a high-resolution image and make it smaller than to enlarge a low-resolution image. Once an image is at a low resolution, enlarging it does not give it any greater detail, it will instead look blurry or pixelated. Images intended to be displayed on computer screens are generally set at 72 d.p.i. Images intended for printing should be at least 300 d.p.i. For photo-quality images, you may want to go up to 600 d.p.i.
Changing the resolution without changing the size will make the image appear either larger or smaller on your screen. This is because the computer screen has a fixed resolution. If you increase the number of pixels per inch of the image, the computer screen has to make the picture larger to compensate, because it can't change the number of pixels per inch of the display. Correspondingly, if you decrease the resolution, the picture will appear smaller. However, the size of the image when printed out will not change, because a printer can print at many different resolutions. Instead, the image will look sharper or more blurry.
Below the resolution field is a place to select the image mode. This determines the way colors are handled in the image. You have five choices: Bitmap, Grayscale, RGB Color, CMYK Color, and Lab Color.
Bitmap
Bitmap images are only in black and white. You will generally not use this mode unless you are doing an extremely simple drawing. You may wish to use it when designing a custom brush, but it isn't necessary.
Grayscale
Grayscale images range from black to white with many shades of gray in between. You may wish to use this mode if you intend to print with a black and white printer or if your image is going to be photocopied. You might also use it when scanning in images if the original itself has no color, such as an ink drawing.
RGB Color
This stands for "red green blue" and represents a mode of color selection that determines each color based on its red, green, and blue values. These are the "primary colors" of mixing wavelengths of light. RGB Color mode is used for images intended to be viewed on computer screens or for general home color printing.
CMYK Color
This stands for "cyan magenta yellow black." Each color in this mode is determined by four values for the four colors of ink used in color printers. This color mode is used by professional printing companies.
Lab Color
This is a mode in which the colors are based on the three factors of luminosity, green-red, and blue-yellow. You will probably never use this mode.
Once you choose the size, resolution, and mode that you desire for your image, you may select what color (if any) you want for the background. All of these values can be adjusted after the image has been created, so with the exception of resolution as noted earlier, you shouldn't worry too much about getting them exact at first.
If, rather than creating a new image, you wish to open a stored image, click "Open" instead of "New" in the File menu. The shortcut for this command is Ctrl + O. When you do so, an explorer window will open that allows you to browse through the contents of your computer for files. Simply click on the desired image and hit the Enter key or click "Open."
In the explorer window, you can open multiple images at the same time. Open multiple contiguous files by holding down the Shift key while clicking on the first and last image. Open multiple non-contiguous files by holding down Ctrl while clicking on each individual image.
If you intend to scan an image, you must first make sure you have a scanner connected to your computer and that the correct drivers are installed. When such preparations are taken care of, you can scan an image by going to the File menu and clicking "Import." Various options will appear; select the one that pertains to your scanner.
As with creating a new image, you will need to determine the proper scanning mode and resolution to suit your purposes.
 After you have opened an image, you can alter its size, resolution, and mode with the Image menu.
The first item on the menu is "Mode." In addition to the modes listed above, there is a new mode called "Indexed Color." This mode restricts the number of colors in the image to a limited palette and is used when saving images in .gif format. It is good for simple images with few colors, but if used with pictures with subtle color differences, the result will lose detail.
Below, the three main color modes that you are likely to use or encounter are illustrated.
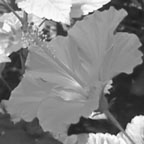
Grayscale |
Indexed Color (Web) |

RGB Color |
 Farther down the menu is the "Image Size" item. Clicking this brings up the "Image Size" dialogue box. With this dialogue box, you can manually shrink or enlarge the image to the desired size.
The important thing to note about this dialogue box is the icon of a chain linking the width and height. While this chain is showing, changing either the width or the height alters the other dimension so that the image retains the same proportions no matter what size you input.
If you wish to alter one dimension without changing the other, click on "Constrain Proportions" to remove the check.
You can change the size and resolution at the same time, or you can change them at separate times while you work. If you decide not to change anything after opening the dialogue box you can click "Cancel." If you alter the size yet are not pleased with the result, you can undo it later.
 While you are working on your image, you may find that you wish to draw or paste something beyond the edge of the picture at its current size. To change the size of the canvas around your image without changing the image itself, click on the Image menu item "Canvas Size." This brings up the "Canvas Size" dialogue box.
In this dialogue box, changing the width or height leaves the original image in the center of the canvas. If you want to anchor one side or corner of the image to the edge or corner of the canvas, click the appropriate arrow in the "Anchor" section.
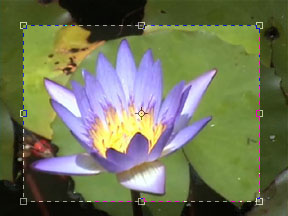
 If you need to crop excess portions of your image, you may use the Crop tool from the toolbar. Click on the Crop tool icon, then click and drag the cursor across the image to frame the portion that you wish to keep. You can alter the area to be cropped by clicking and dragging on the handles of the cropping frame. When you are satisfied with the result, you can perform the crop by clicking on the checkmark at the upper right side of the workspace, double-clicking on the image, or hitting the Enter key. Below is an illustration of the cropping process.
Homework
Open several images and play around with altering the size, resolution, and mode. If you do not have any at hand, you may download the flower images posted here and use them for practice.