I will try to convert measurements to inches wherever possible, but when it gets down to millimeters, it's simply ridiculous to try to approximate them in fractions of inches. It will be to your advantage to invest in a metric ruler.
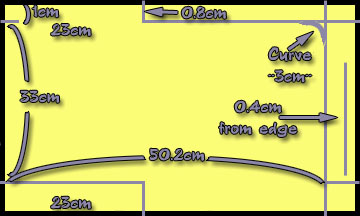
The marks should be made according to the diagram below:
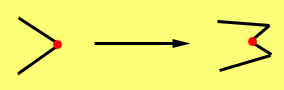
The right side of the diagram shows the cross section of a kise. The red dot indicates the actual seam. The kise itself is very narrow, usually only 1-2mm.
Fold the sleeve so that the wrong sides are together and sew along the red line. Fold the fabric about 0.2cm (kise allowance) inward from the seam and press with your fingers to form a light crease.
Once the crease has been made, flip the sleeve so that it is inside out, with right sides together. Do not open the edge completely to the seam. Instead, open it to the crease you made so that the seam is hidden as shown in the kise diagram above.
By hand, using doubled thread, sew two curves along the dotted lines. The first curve should be about 0.4cm from the seam, and the second curve should be about 0.2cm from the first one. Leave a length of thread dangling at the end of each curve.
Sewing the Curve
 In order to prevent the free edges from raveling, the traditional method is something called "pouch sewing" that encases the free ends inside a small "pouch" of fabric. If you have already sewn the free ends, you can skip this step.
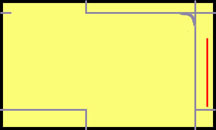
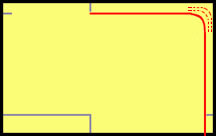 With the sleeve folded right sides together, sew along the solid red line. Backstitch slightly at each end.
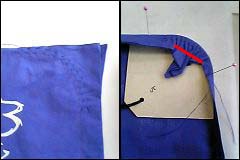 With the side of the sleeve that is intended to be the front facing upward, place the cardboard curve 0.2cm (kise allowance) inside the curve of the seam and fold the material over it, pinning it in place at either end of the curve. Push the pins all the way through the cardboard. Pull the ends of the hand-stitched threads to gather the corner. Iron the gathered material and then lightly backstitch the gathers in place where indicated by the red line. Remove the cardboard cutout.
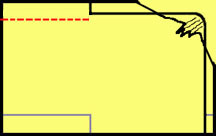 Fold the edge of the fabric inward so that the edge meets the 1cm (3/8") mark, the red dashed line in the diagram. Start at the base of the wrist opening, go up around the shoulder, and then back down to the base of the wrist opening on the other side. Fold inward again at the 1cm line to make a narrow hem.
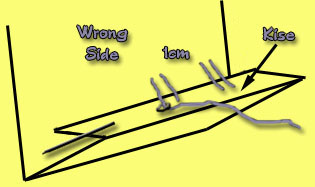 Sew this hem with stitches roughly 1cm apart. Your needle should pass through between the folded layers of the hem so that most of the thread is hidden, dipping outward to make a tiny stitch through to the right side of the fabric, and then returning under the fold. Do not sew exactly on the tip of the crease of the folded edge of the hem, but rather about 0.1cm from the edge (kise allowance).
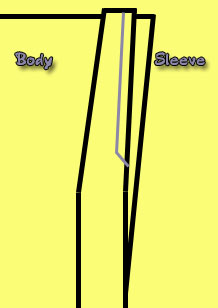 Pin the shoulders together such that the marking on the sleeve's shoulder fold is 0.4cm from the edge of the body's shoulder fold. Continue pinning downward, keeping the sleeve's marking a constant 0.4cm from the edge of the body's arm hole opening.

