


In order to keep abreast of current technologies and techniques, I have been investigating digital fabrication through a series of small projects using a lasercutter, Computer-Numeric Controlled router, and 3D printer. Some of these projects are ongoing, but work so far is shown below.
To investigate software and 2D techniques relating to CNC routing, I am using AutoCAD and MasterCAM software to create a Doric frieze of alternating triglyphs and metopes. I decided to have some fun with this project, and instead of depicting heroic scenes on the metopes, I am depicting "heroic" buildings. Choosing the buildings has been challenging; the selected buildings are intended to be significant examples of a broad array of architectural styles. However, each building must also have a simple, distinctive form, so that its "essence" can be abstracted into a few wide strokes able to be cut with a router.

The triglyphs and metopes were first cut into cheap hayboard for the purposes of identifying cutting depths, buildings to depict, levels of detail, and other parameters that would work well. Some of these panels have subsequently been stained after cutting, to provide an indication of the eventual appearance of the frieze. The final frieze will probably be cut into hardwood stained prior to cutting, with the cuts exposing the natural wood color beneath.


The final frieze will hopefully reach a length of a few dozen linear feet, with the panels being about 9 inches tall.
3D capabilities of the CNC router were explored through another short project. The intent was to learn and practice using software to generate toolpaths to create sculptural 3D surfaces. The router was used to remove material to rough out the form (below left), then to smooth out the surface using a finishing cut (below right).
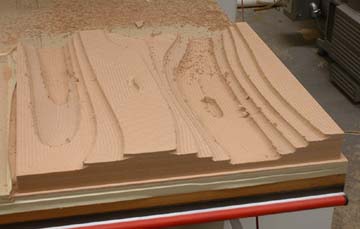
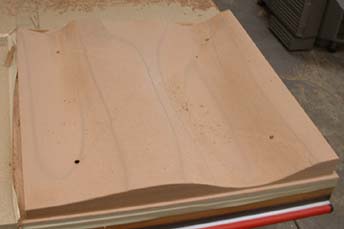
Surfaces generated in this manner can be used directly as architectural elements, or used to create formwork for concrete or molds for other materials.
Another project has involved use of a lasercutter to create a prototype of a decorative interior wall panel. Lasercutters are often seen as tools for creating models; they are capable of cutting and scoring breathtakingly detailed model components. However, in this project (and the one that follows), I explored the use of lasercutters to produce actual building components.
The wall panel is constructed from 3 sheets, each cut and scored by the lasercutter and combined to create a layered effect. Overall panel size was constrained by the dimensions of the lasercutter bed. Within these constraints, a width of 16 inches wide was used to facilitate attaching the panels to studs. The design includes small square pieces that are intended to be glued into place to cover the nails.

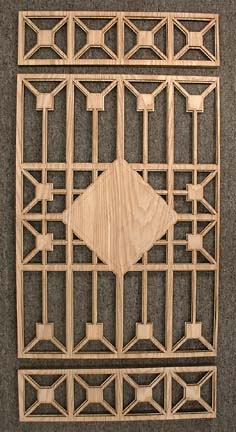
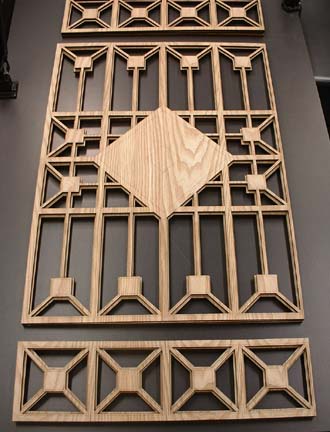
The panels are intended to fit into posts and horizontal members to be cut using the CNC router.
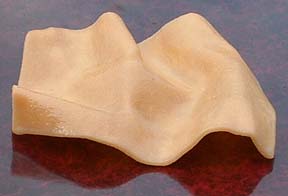
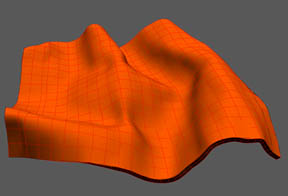
Another short exercise involved using a Z-Corp 3D printer to produce a 3D model of a shape generated in Rhinoceros. This was just a short project to familiarize myself with hardware and software capabilities and techniques. The cornstarch physical model, below left, is the output produced from the computer model shown below on the right.
More information: