Sky Globe - Star Chart of the Entire Night Sky
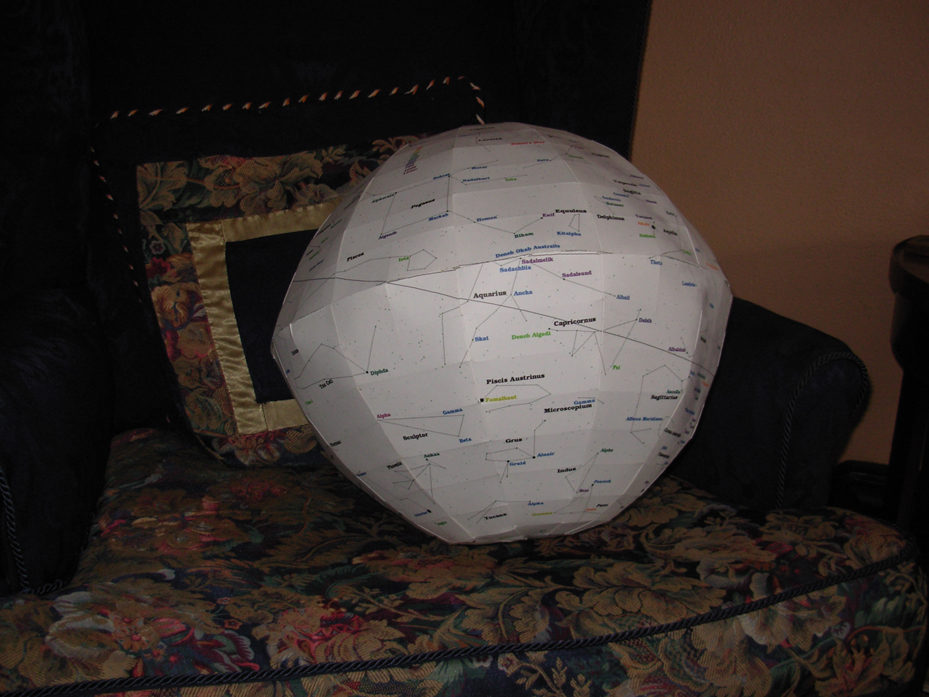
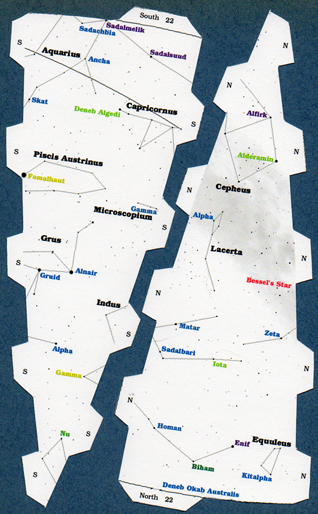
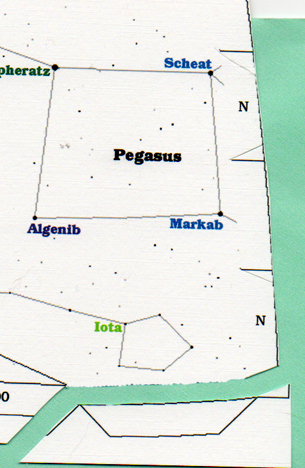
The Sky Globe is constructed from 24 gores, 12 for the Northern Hemisphere and 12 for the Southern. They were printed on 12 sheets of standard size card stock. The Constellations names are printer in black and the star names are colored to indicate their distance from Earth. There are 88 Constellations and 291 stars. These "landmarks" are visible with the naked eye at various times throughout the year.
The 12 image files (150 dpi) can be seen in the directory /gores_jpg. Download then one at a time or download gores_jpg.zip for all of them. The Photoshop PSD files are also available in the directory /gores_psd for downloading. The assembly instructions are in the directory /guide.
All material may be used, transferred, replicated and duplicated in any form by any sentient being.
- James Waurzyniak © 2014 - jimw@umich.edu
This entire work may be downloaded for offline use or to be mirrored on the Web - Skyglobe.zip
Assembly - Please read the steps before cutting, folding, taping and gluing.
A. Gores face up:
1. Print each page on 8 1/2 by 11 card stock without resizing the image.
2. The tabs have the letter "N" or "S" on them. Do not cut them off.
3. Each gore has a tab at the equator labeled with its Right Ascension.
4. Cut off the unlabelled equatorial area at the equatorial line. It is not a straight line.
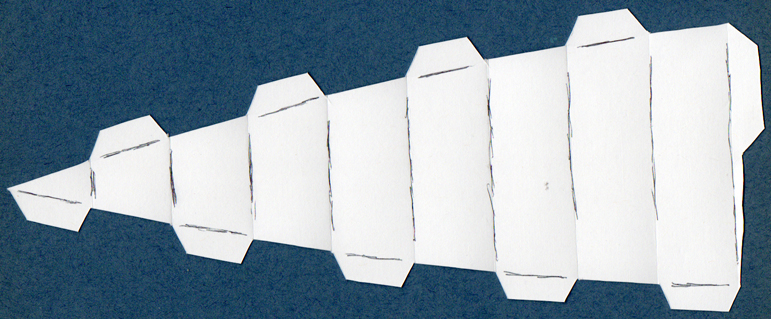
5. Cut off the crop marks so that each "N" and "S" tab is a trapezoid slanting 6 degrees inward on the short sides.
6. Using a straightedge, cut between the tabs. The line between tabs is slightly curved, but I lack the skill to cut freehand.
7. The crop marks at the poles do not meet each other. There is a tab on one side and a straight cut on the other.

B. Gores face down:
8. Using a straightedge, very slightly fold the tabs inward. Do Not Fold the tab at the Equator.
9. Line up the straightedge from the bottom vertex of one tab to the top vertex of the tab on the opposite side of the gore. It is perpendicular to a line from pole to equator. Fold the gore a small amount.
10. The tab at the Equator has a curved base line. Using a straightedge, slightly fold on a line intersecting the base vertices of the gore.
C. Tapping and Gluing the Gores
11. I am still experimenting to find the best method.
a. Select two adjacent gores, Attach together at a mid-latitude. Attach at the pole then equator.
b. Attach at other tabs. I used tape inside worked in spots of glue from the outside.
c. Complete one Hemisphere in this manner.
D. This is a little tricky:
12. The base of the equatorial tab is a curved line. Apply some glue to the tab labeled "North". As you affix the North Gore to the South Gore the paper will bend. Apply glue to the tab labeled "South" and finish the attachment resulting in a nice straight Equatorial line.
a. Attach one gore at the equator.
b. From section C-11 repeat steps a. and b. and attach at the equator as progress is made around the Hemisphere.
E, Tapping and Gluing the Last Gore
13. Put tap on some, but not all of the remaining tabs of the nearly completed globe.
14. Attach the last gore at the equator.
15. Work the tabs into the interior of the globe.
16. I slid a butter knife into the globe where a tab had no tape to secure the taped tabs on the opposite side of the gore.
17. I worked in a little glue onto the untapped tabs and gently pressed the remaining seam together.
Notes:
Images generated with Stellarium and cut into tabbed gores with Photoshop
http://www.stellarium.org/
An Alternate Model - StellaSphaera - suopte (Bence Ágg's website)
http://suopte.com/en/apps/stellasphaera.php
Interesting - The Universe within 50000 Light Years - The Milky Way Galaxy
http://www.atlasoftheuniverse.com/galaxy.html