Creating 16x9 format
for video/TV output
Final Cut Pro ONLY
(Final Cut Express doesn't support 16x9 easily)
1. Open Final Cut. Create a new project. Select/double click on the SEQUENCE icon. Go to the Sequence menu>Settings.
Set your sequence to have the same settings as this:

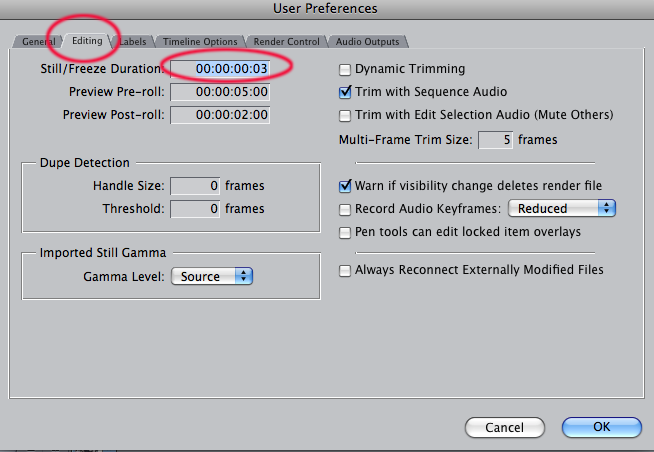
2. If you are importing still images for an animation, you need to reset the STILL IMAGE length in the Preferences:
Final Cut Pro menu>User Preferences>go to the EDITING tab and change the STILL/FREEZE DURATION to 03 or 04 (3 or 4 frames).
(otherwise each image will be 10 seconds (yawn!) long)
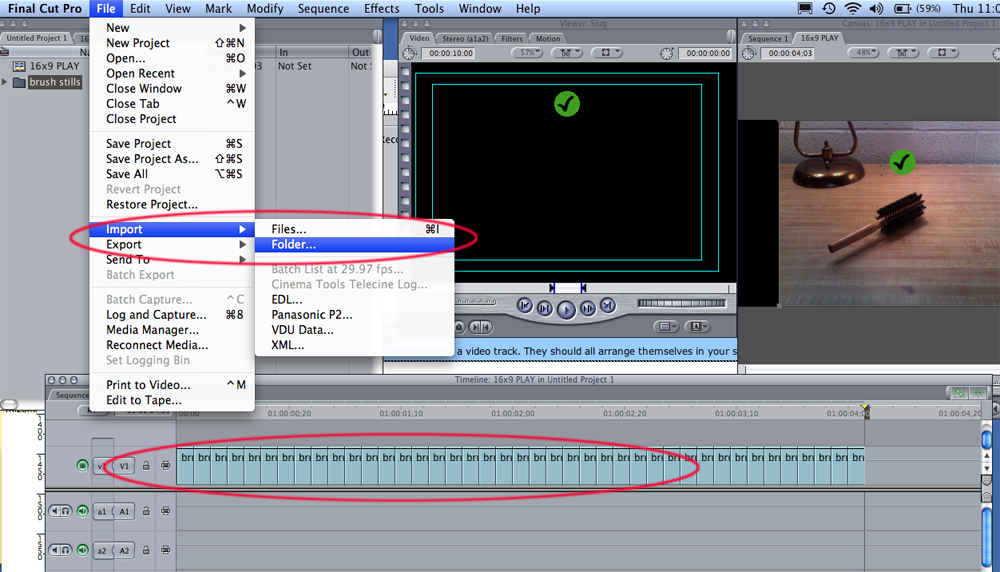
Put them all into one folder (File menu>New>Bin (creates a new folder)).
Drag the FOLDER into the timeline onto a video track. They should all arrange themselves in your sequence in numerical order:
4. Work on the timing of your piece by changing the length of some of your stills. You can select and move the stills using the SELECT (arrow tool). You can make a still longer by clicking/dragging onthe end of the still. You can shorten a still the same way or use the RAZOR BLADE tool. Getting the timing right for your piece involves a lot of TWEAKING in this way. You may find that some stills need go quickly and be 02 frames each, while others need to stay on screen for 1.00 (1 second). Make changes, watch it. Make changes, watch it. Work it until it flows right....

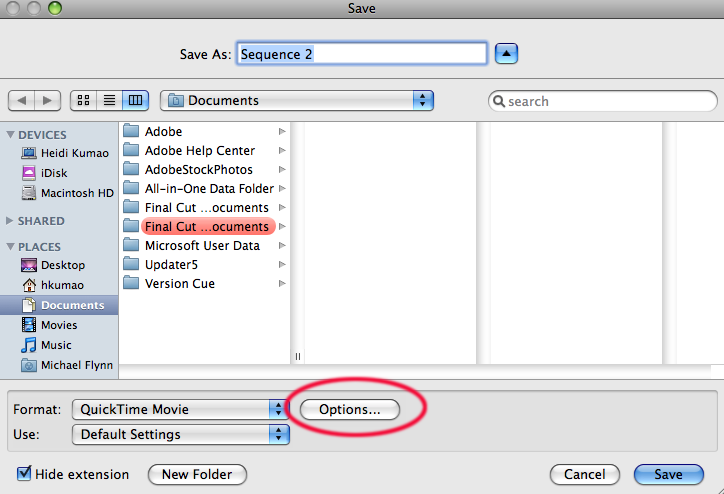
File>Export>Quicktime

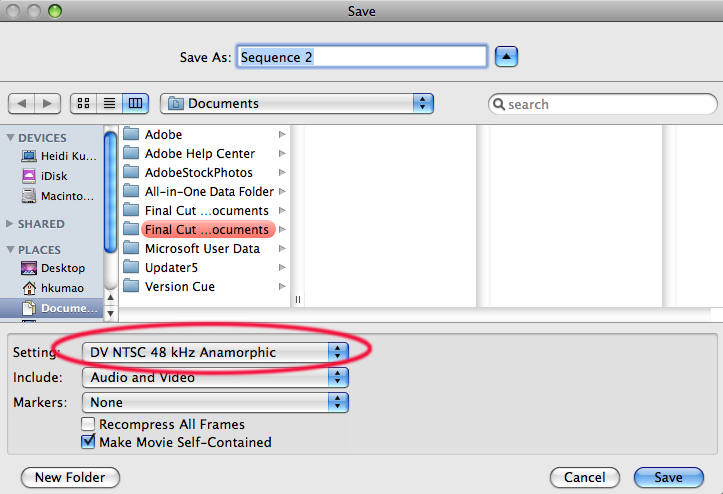
7. This SHOULD produce a 16x9 movie that can play properly on television...You are done!
If it doesn't, try exporting this way:
File>Export>Using Quicktime Conversion.
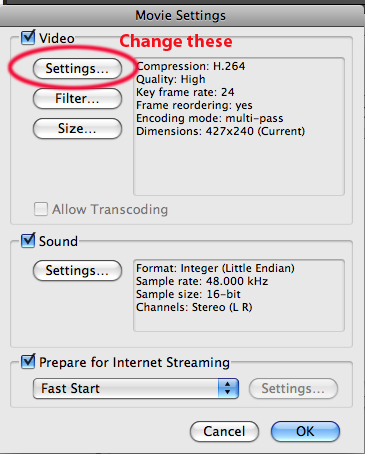
In the dialog box, click on OPTIONS