|
|
|
|
|
|
Building a competition rig for the Victoria A photo series by:
These pictures are intended to provide guidance in building a racing rig for the Victoria one design model yacht. These are by no means the only way of accomplishing such a task, but it is a pretty inexpensive and rapid way. All of the materials are readily available and there are few modifications to the stock boat and its deck. You will need to refer to the Class Rules available at http://www.intellisys.net/AMYA/victoria.html#Rules Most of these construction details come from my experience with the Victor Products model kits. These are nice, inexpensive, and well designed boats that require a bit more builidng skill than the Victoria. Sea trials of the rig have gone well except for an incident with a tree, a fishing lure, and fishing line in the tree. Pictures from the first trial are available on the following page (linked here). The First Lansing Sailing Club Vic Regatta was held on Lake Lansing on 10/24/99. Pictures will be posted shortly.The second LSC Vic Regatta was held 10/31/99 at Gallup Park in Ann Arbor. Photos from this regatta are on this linked page. |
 |
||
|
|
|
|
|
|
|
|
|
|
|
|
|
|
|
|
|
|||
|
|
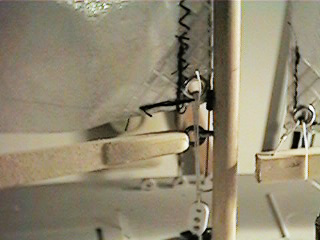
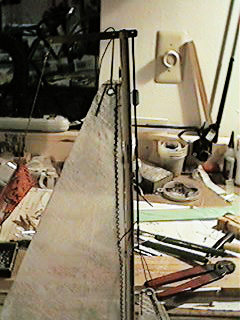
Gooseneck
and downhaul arrangement The Comp Rig gooseneck is nothing more than an eye screw and a cotter pin. The eye screw is threaded into the end of the main boom. The main boom is about 1/2" wide by 1/8" thick. This turned out to be a bit too thin and I had to reinforce the gooseneck area. I would suggest a 3/16" thick boom. Length of the boom is to the maximum dimensions allowed by the class. As can be seen here, the stock mast has been replaced with a 1/4 - 5/16" diameter dowel. |
|
|
|
|
|||
|
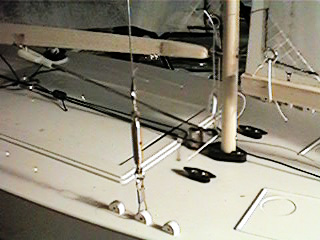
Mast
step and shroud I left the original plastic eyes in place as well as the cleats. I use the eyes but have no need for the cleats. The eyes should be sufficiently strong, but if you have your doubts you can go the extra mile and install eye screws. I would suggest also providing wood backing pads to anchor the screw eye. I stepped the new mast into the stock mast step, but as can be seen, the new mast is smaller in diameter than the stock mast. To compensate for this, I added a wood insert in the hole. I then drilled a 1/16" hole in the insert and in the base of the mast. I then glued a small lenth of steel wire into the mast foot. When the mast is stepped, insert the wire into the hole in the wood pad. The shroud is 40# test leader wire with loops swagged in place. I use small bronze turn buckles available in the hobby stores. The deck end of these are connected to a fishing clip using a steel slip ring. |
|
||
|
|
|||
|
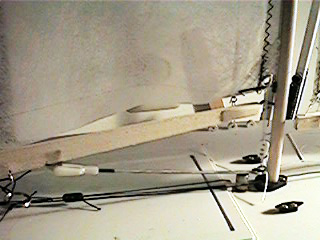
Boom
vang assembly I like the solid boom vang arrangement and use a push rod for that purpose. At the clip end I cut a piece of aluminum, drilled a hole in one end, cut a slot into the boom (the same location as the stock attachment point), and glued the bracket into the slot. On the boom end of the vang, I drilled a hole just above the mast step (clearing the keel bolt) and screwed in an eye screw. I then bent a loop into the push rod and closed the loop after I had inserted it through the eye screw. As you can see here, I did not change the stock main sheet gear. |
|
||
|
|
|||
|
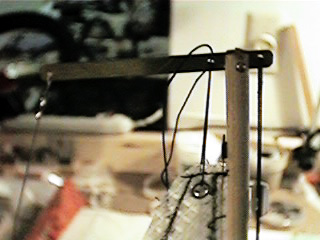
Masthead
crane detail The class rules require the masthead crane to be less than a 3 inches. Material used is brass because it is stiffer than aluminum. I drilled 3 holes to accomodate the main halyard, the jib halyard and forestay, and the bcakstay. Cut a slot in the top of the mast then glue crane piece into place. Drill a hole through the mast and the crane, then push a brass nail through. Pound over the nail end to make a rivet to secure the crane to the masthead. |
|
||
|
|
|||
|
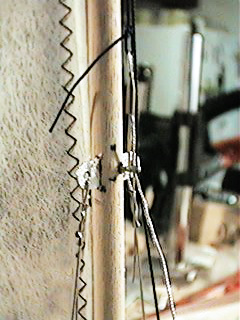
Shroud
and forestay detail This fitting is a bit complicated, but works pretty well. First I cut a piece of aluminum about 1" long. I drilled holes in both ends and rounded the corners. Using a Dremel tool, I carved out a slot in the middle of the mast at the appropriate height above the deck for the forestay attachment. I slide the aluminum piece through the mast via the slot and glued it in place with a bit of epoxy. When it had set, I drilled a hole on the forward side of the mast through the aluminum plate. I then glues a cotter pin in the hole. This makes a mice interlocking connection for the shroud attachments.
|
|
||
|
|
|||
|
Spreader detail For the most part, the Victoria should not require more than a single stay configuration. The thinner scetion mast is pretty flexible and could require a lower shroud in heavy air. As I get more sailing time with this rig, I may make the change. But keeping the plastic deck fittings for the shrouds give you the option of adding either permanent or temporary stays. I placed the main spreader at 1/2 the height from the deck to the mast forestay attachment. Length of the spreader is the outside distance from plastic eye to plastic eye The spreader is made from 1/8" diameter brass tubing with the ends flattened. Drill a hole through the mast, slide the tube through, glue in place, flatten ends, then drill holes to pass the shrouds through. As an option, you could just drill holes at the end of the tubes rather than flattening them. |
|
||
|
|
|||
|
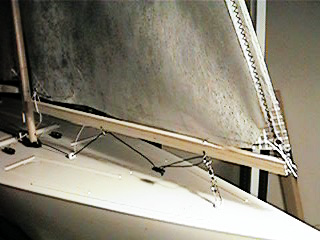
Backstay
and main clew detail The boom is the maximum 15" length allowed by the rules. The backstay is wire connecting to a piece of line. The line is threaded through a fishing clip and lead back to a bowsie. As you can see in the photo, the sail clew is attached to an outhaul which is run through a hole drilled in the end of the boom and lead back to the eye screw that serves as an attachment point. |
|
||
|
|
|||
|
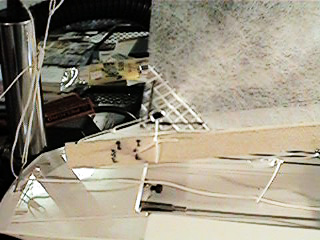
Jib
boom assembly I made the jib club out of a piece of 1/8" thick by 1/4" wide basswood. The connection for the jib sheet is lead up from the stock plastic eye through the small eye screw then through the swivel attachment eye screw, back to a bowsie. I have also added a forestay to the boat. This is attached to the jib club by way of an eye screw threaded into the end of the boom. The forestay is passed through a sleeve sewn into the jib and passes through the forestay mast attachment up to the mast crane where it can be adjusted with a bowsie (see the picture below). This is where I may make some modifications to the stock deck. The lead to the jib boom from the deck is not as clean as I would like, and the swivel point should probably be farther forward to ease tension on the leech of the jib. More sailing time with this rig will tell. |
|
||
|
|
|||
|
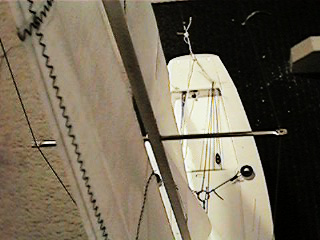
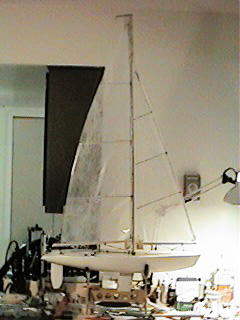
Masthead
arrangement This picture is a zoom-out of the masthead configuration. In particular note that I have lead the forestay and jib halyard up through the hole in the from of the masthead crane. These are independently adjustable with bowsies.
|
|
||
|
|
|||