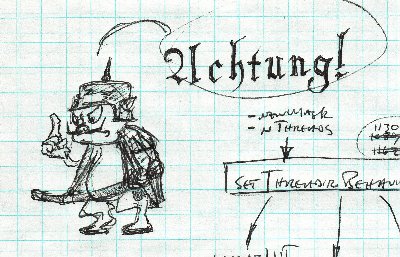
Keypad layout, with the monitor's mappings:
|
|
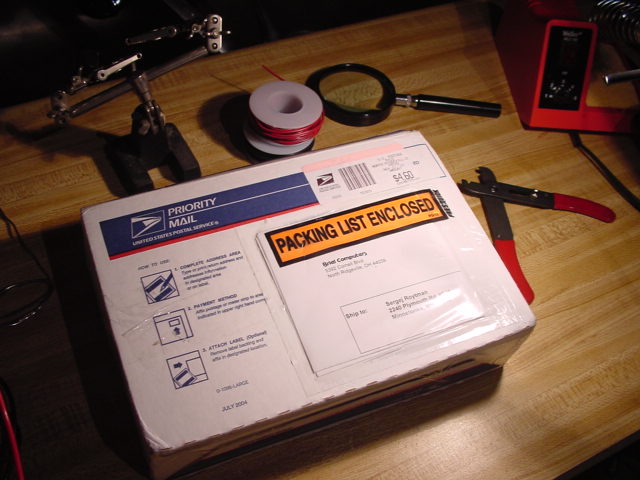
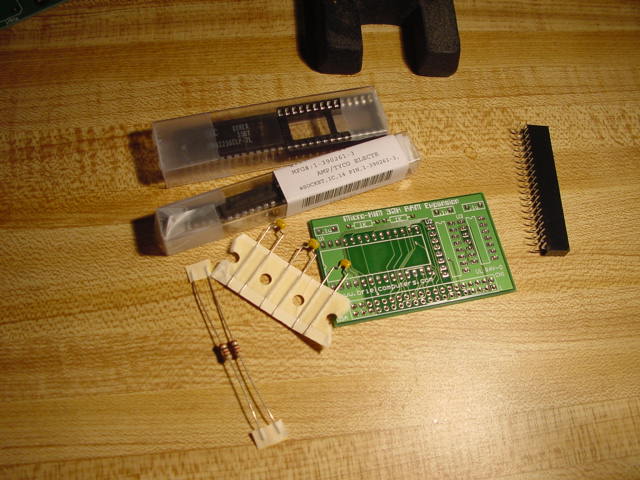
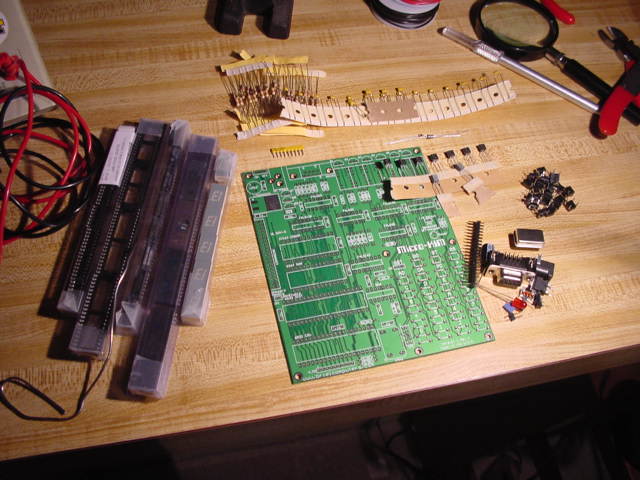
| The package from Briel Computers arrives! Inside: the uKIM rev. 1 board and all the bits that need to go on it (with the exception of one sixteen-pin DIP socket as it turned out, though that was easy to obtain without bothering Mr. Briel and co.), the 32K daughter board kit, and a CD of documentation. I sharpen my soldering iron and warm up my wire strippers in anticipation! | |||||||||
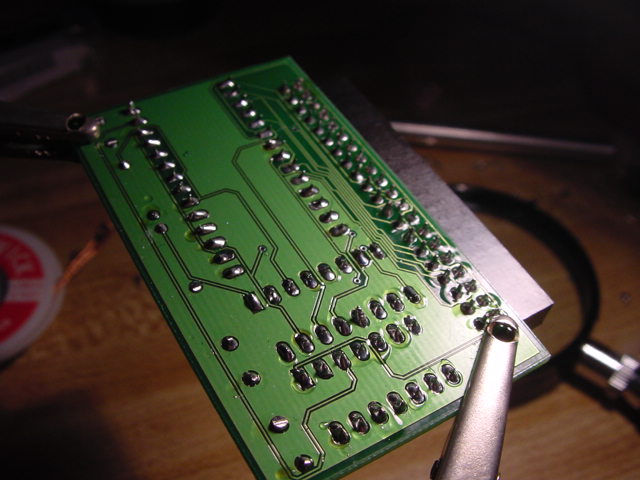
| I tackle the daughter board first, to get its pieces out of the way and to find the right temperature setting on the soldering iron. The boards are two-sided, with plated-through holes. | |||||||||
|
Mmm... the smell of burning rosin! That brings back
memories, it does. *sniff*
Solder side, finished. | |||||||||
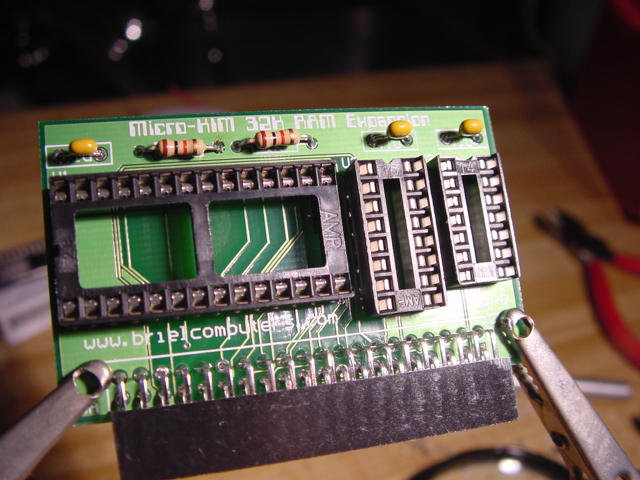
| Component side. | |||||||||
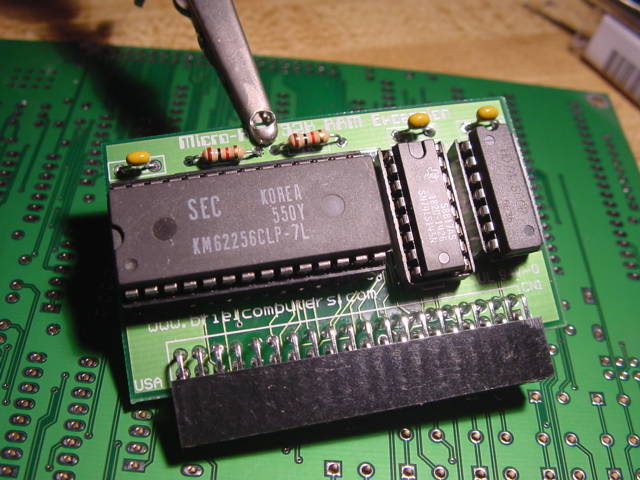
| Component side, populated. | |||||||||
| The main board is slightly more complicated, and takes a bit longer. | |||||||||
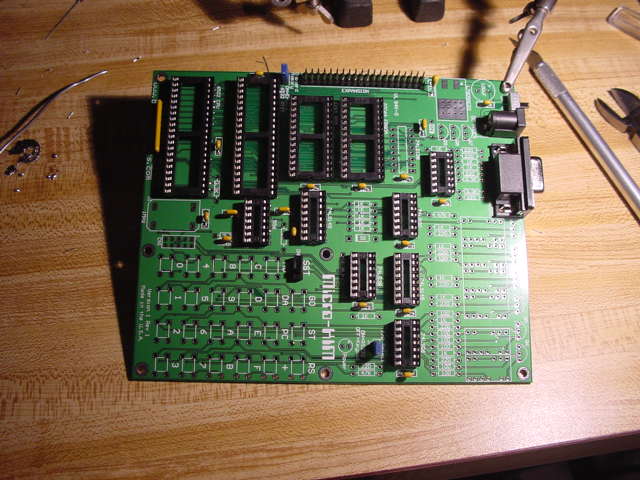
| Assembling... | |||||||||
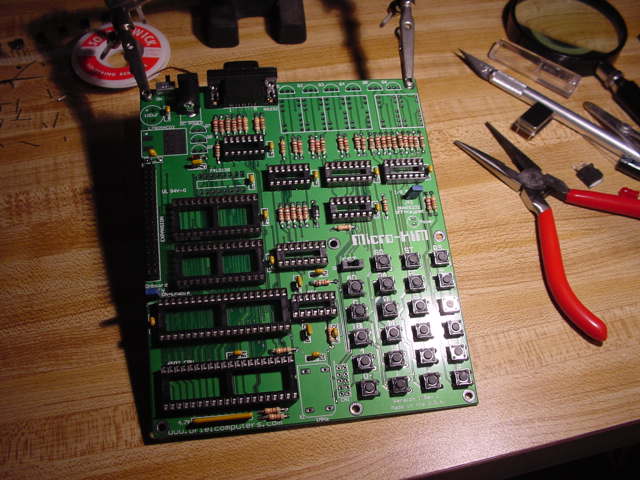
| Assembling some more... | |||||||||
| Component side, done. | |||||||||
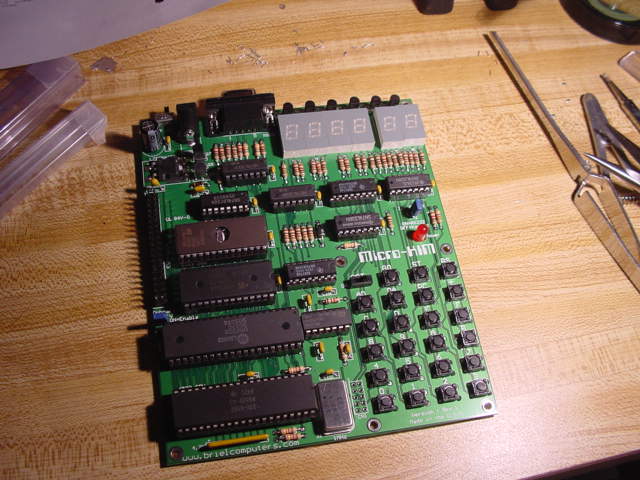
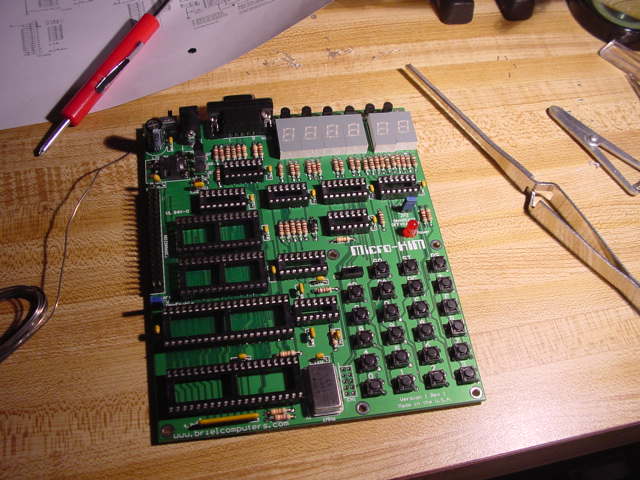
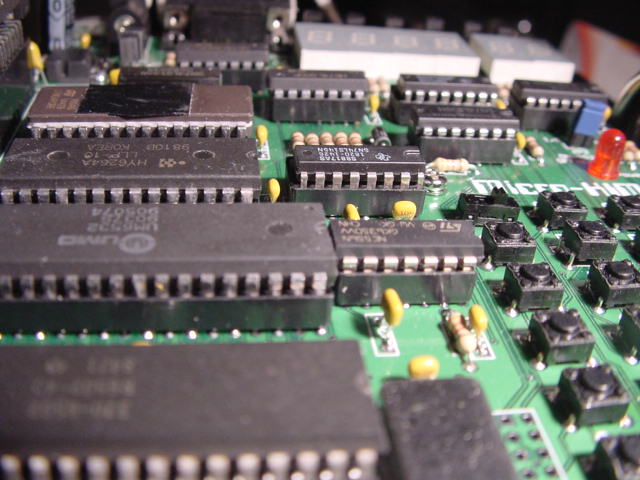
| And with the ICs installed. The 40-pin DIP in the lower left-hand corner is the 6502 CPU. The crystal (immediately to the right of the 6502), power-on LED and LEDs for the seven-segment display required a new soldering iron tip from Jameco, as the one I had was a bit coarse and the leads on these components are too short for a heat sink. Which was OK, since I needed to order the DIP socket anyway. | |||||||||
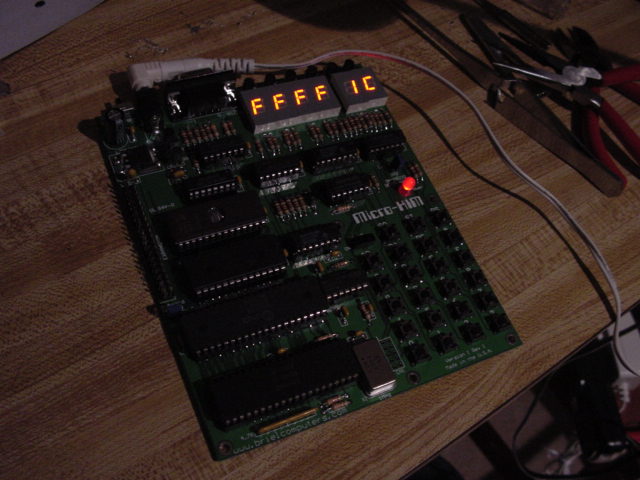
| First powerup. Hit RS, and this pops up. No release of magic smoke: must be good! | |||||||||
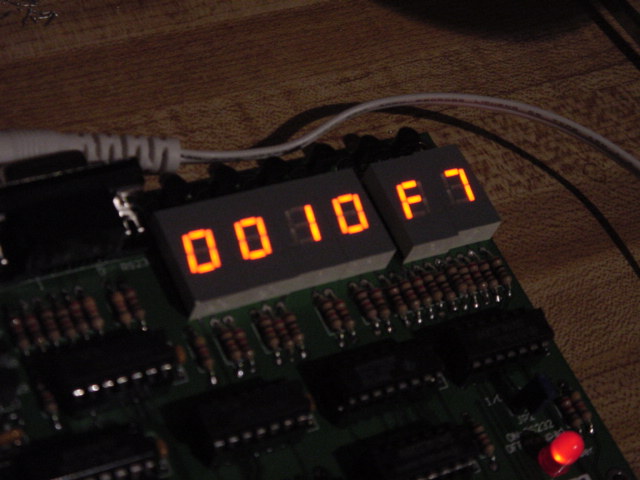
| *(0x0010) == 0xf7. | |||||||||
| *(0x0011) == 0x50. | |||||||||
|
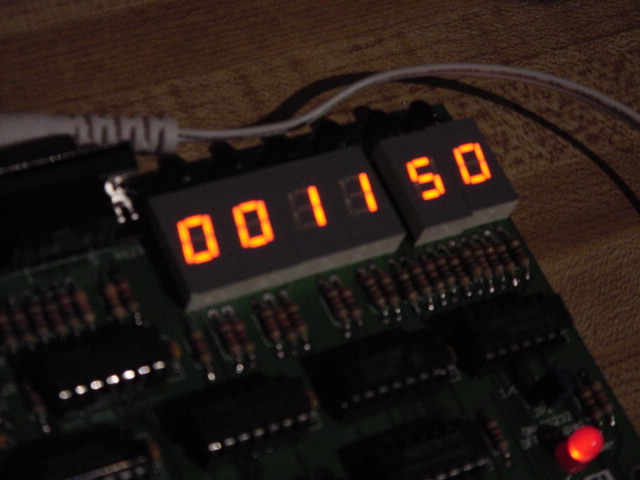
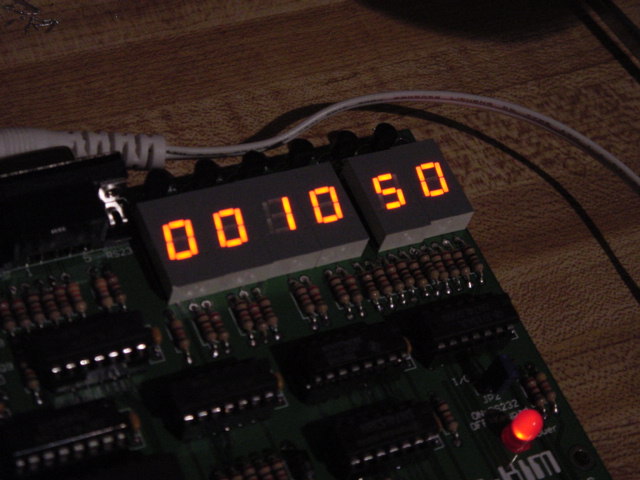
Huttah!
Now *(0x0010) == 0x50, and... | |||||||||

|
*(0x0011) == 0xf7.
This is a result of running... | |||||||||
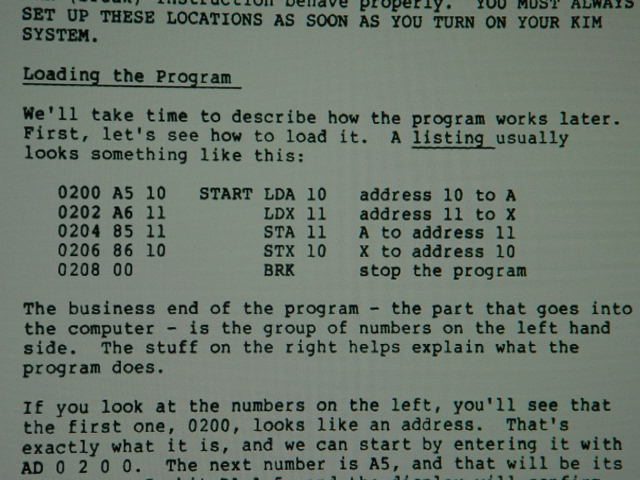
| this program, from... | |||||||||

|
the First Book of KIM, 1986 edition,
helpfully supplied as a PDF by Briel Computers.
This shows that the uKIM is at least minimally functional: capable of accepting and storing data, and running a few lines of code. Since the daughter board runs address decoding when it is enabled, it also indicates that this part of the 32K RAM board works. | |||||||||
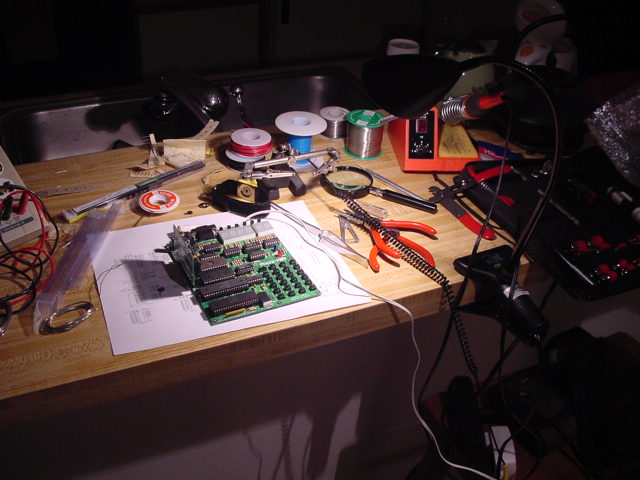
|
And this is one reason I ended up going into
software. This is a picture of what used to be
my breakfasty-type space with a view to the
kitchen, giving a light airy quality to the
interior space, etc., etc. Heh. I built the
uKIM over a week of soldering, with significant
breaks, and this is the mess that grew up!
Just turning on the soldering iron is enough
to raise the entropy of a room, it seems!
(Yeh, that's my kitchen sink in the background.) | |||||||||
| ||||||||||
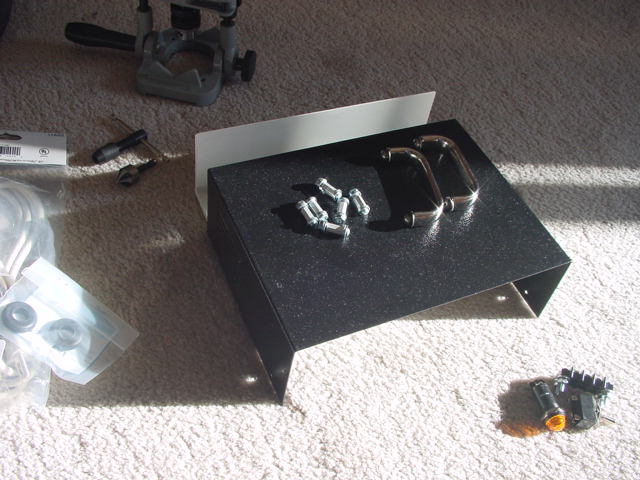
| Parts of the enclosure, newly arrived from Jameco. The upper section of the enclosure is steel, the lower section aluminum. The enclosure came with four rubber feets, and I supplied additional hole-covering grommets, bolts, etc., as needed. | |||||||||
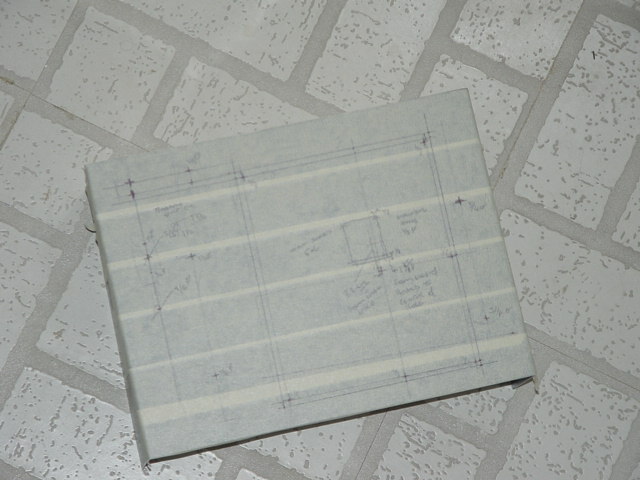
| Enclosure top, taped and marked. The masking tape covering protects the finish from marring if a tool should slip, and provides a markable surface. | |||||||||
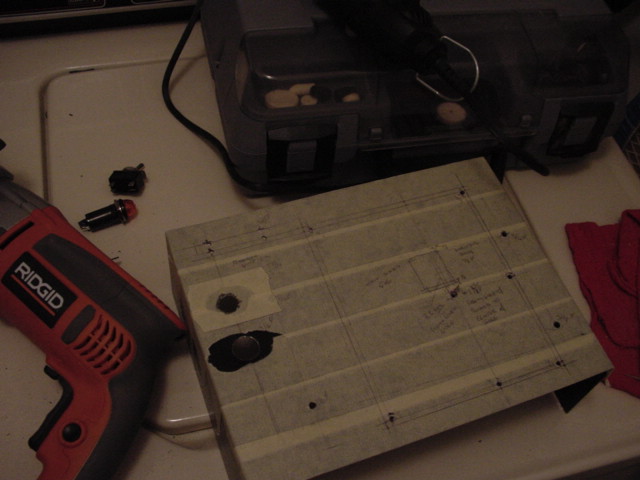
| Measure with a micrometer, mark with chalk, cut with an axe: the enclosure top after machining. The process was neither an easy nor a pleasant one for any human or enclosure involved, but in the end I was victorious | |||||||||

|
Enclosure, bottom, machined. The aluminum bottom was a
lot easier to work than the steel top. And yes, that
is the top of my washing machine. My apartment has hard
floors in the kitchen and laundry room, and I make coffee
a lot more often than I wash clothes.
This could be an argument for my getting a bigger place. Normally, everything lives in a closet or under some piece of furniture, but during construction, and especially during work on the enclosure, the apartment looked like a hardware store exploded. Bigger place, I could spread out, set up a workbench, maybe a shop vac that I could use to suck up my steel and aluminum shavings. And then empty the thing onto the big pile of oily rags and magnesium chips I'll keep sitting around in the corner. Right next to the reloading bench. Yeh, that'll be real good. | |||||||||
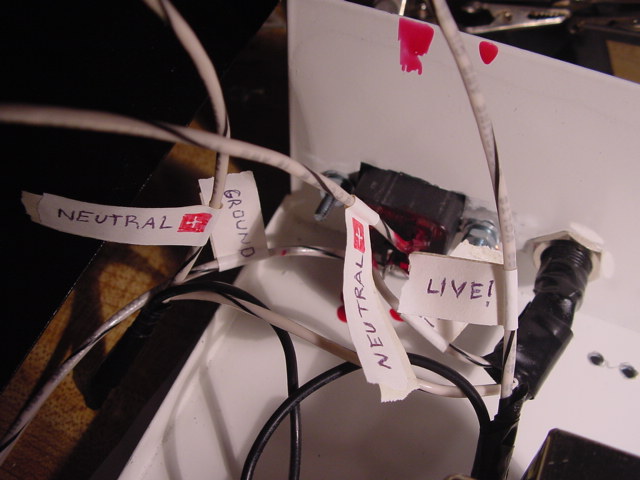
| Wiring (probably not up to code). The red streaks are red-colored paintable insulation, by the way, not the blood of sacrificial geeks. | |||||||||
|
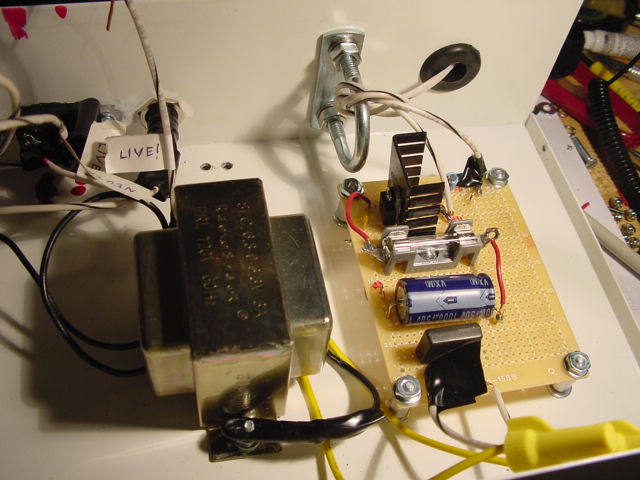
Power supply, installed.
The uKIM follows old-timey S-100 tradition and takes a goofy supply voltage (7.5--9V), which it then regulates down to 5V on-board. I designed the power supply to provide up to 3A at 8V, right up until the voltage regulator; only regulator Jameco had in the right range was 8V at 1A. So I guess if I ever want to use this power supply to run an arc welder, I'll just add a second regulator in the unused portion of the perfboard. The U-bolt is for strain relief. I'm sure that anyone who does something other than software would find this amusing. I also followed ancient usage, and specced a linear power supply. Unused watts are shunted to ground, and the waste heat comes out the big black heat sink on the regulator IC. Just like Grandpa Thag used to do back at the old cave. | |||||||||
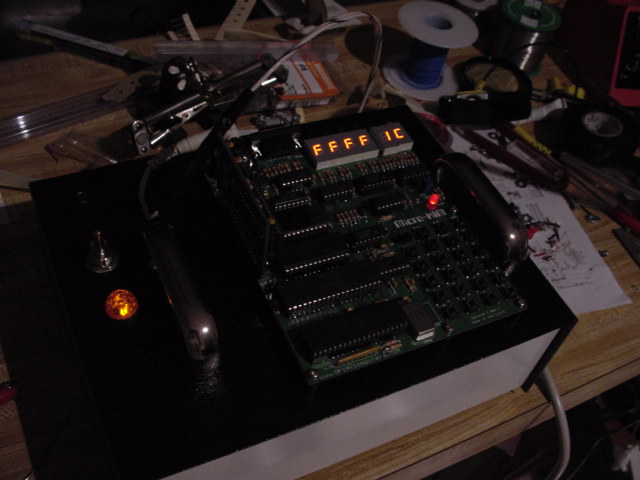
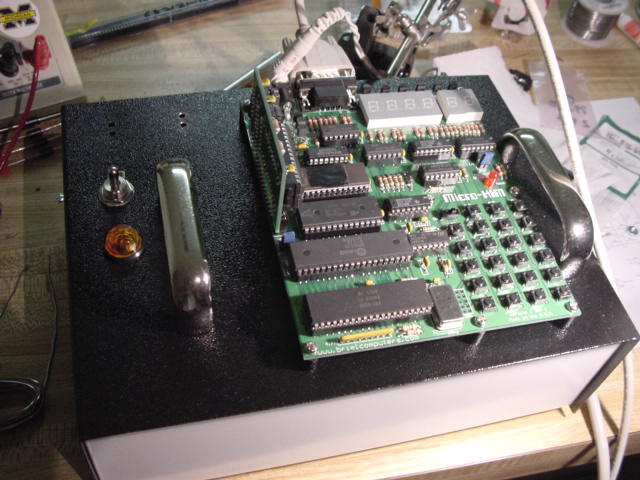
| A rather underexposed photo of power-up. The big toggle switch on the left powers up the power supply, and a smaller switch on the uKIM board turns on the actual device. Both are needed in powering up, as the linear power supply takes a few seconds to reach a full 8V. Both the handles are wired to ground---that's a lot of exposed MOS-based circuitry up there, and Minnesota winters can get dry. | |||||||||
| ||||||||||
|
In The Future, computer technology will make its
presense felt in nearly every facet of our lives.
A computer such as this one might be found in most
major urban centers, providing fast computational
services to their citizens. Balancing their
checkbooks perhaps. Or storing their recipes.
This photo does look a bit like the last scene of Tron, no? | |||||||||
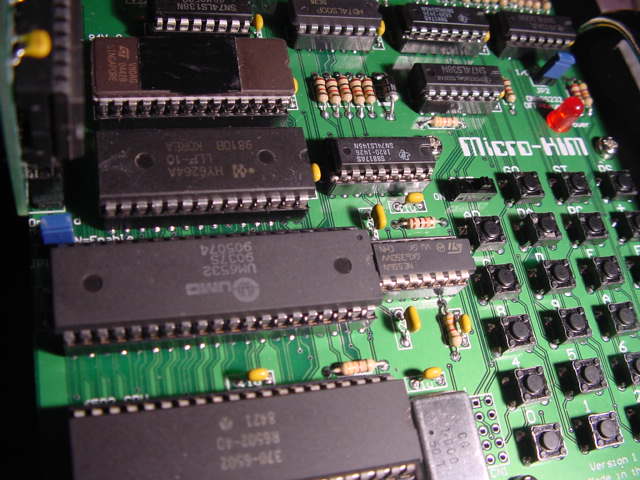
| The circuit board. The piece of electrical tape on the package in the upper left-hand corner blocks light from the window of the UV-erasable monitor ROM. If I bring along a suitable power supply, such as a few 9V batteries wired in parallel, I can now take my uKIM to the beach without fear of wiping the ROM! Incidentally, W--- H--- noted that bringing a beast like this to the beach and sitting down to program is more or less the exact opposite of bringing along a friendly, playful Labrador puppy. To which I say---fools, all of them! I will show them that it is THEY who are mad! I will show them all! And then they will regret (pause for wiping foam from mouth) having mocked me! Cackle, cackle. (Come to think of it, this kind of rantage is also likely to have a somewhat opposite-of-puppy effect at the beach.) | |||||||||
| Another view of the completed project. The four holes in the upper left-hand corner of the cabinet are the result of a misstep on my part. I had planned to put a barrier strip there and route the power through that, but decided to minimize the number of wires that can come loose and get reconnected the wrong way around, and just solder everything together. Not having a proper heat gun, I used a Zippo lighter to burninate the heat-shrink over the wires. Maybe I can put something in that spot. The procedure for downloading and running a standalone program (no external terminal) involves pulling a jumper, so maybe I can use this piece of real estate to install a more civilized toggle switch or two. | |||||||||
Oh yeh, the turning on its creator and stuff...
| ||||||||||
|
So here is where it would be traditional to insert some
action piccies of Micro-KIM going all medieval on me,
preferably in a tense game of Wumpus, and maybe with
something like
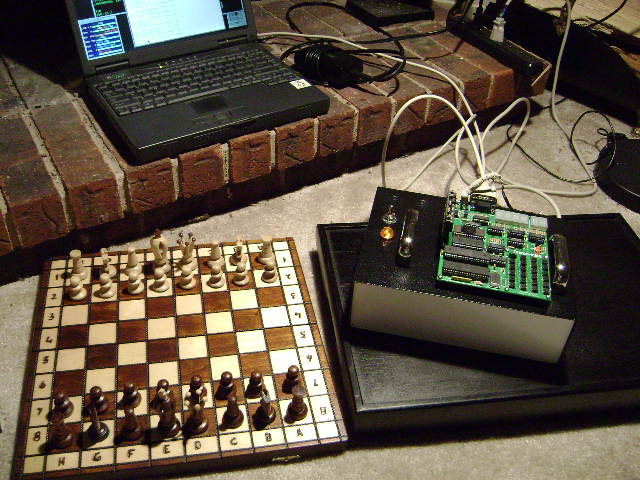
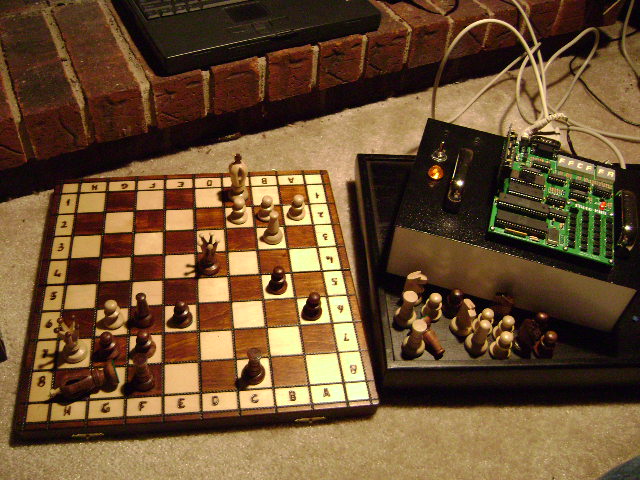
scrolling by on the LEDs. Haha, the machine gets its revenge and all that. Instead, I decided to show a run of Microchess, a really rather impressive program that played a plausible game in the 1K memory of the standard KIM-1, back in 1976. The program earned its developer enough money to go write the ancient spreadsheet VisiCalc, showing that even a project that starts out amazingly cool can turn butt-numbingly dull, very, very quickly. More about Microchess in the links under the pictures. But. Before that..._ _ _ _ _ _ |_| _ |_| _ |_ |_ |_| |_ |_ _ |_ |_| |_ |_ |_ _| |_| |_| | | | |_ |_ | | |_ |_ | | |_| _| |_ | | |_ _ _ _ _ _ |_ | | | | |_| _ |_| |_ |_| _ _ _| |_ _| |_ |_| | |_ _ |_| | | | |_| _| _| |_| |_| _ |_| |_ |_| The setup. Linux laptop acting as a terminal at the top of the pic. uKIM and chess board in the foreground. Standard rat's nest of wires in between. By default, Microchess plays white. | |||||||||
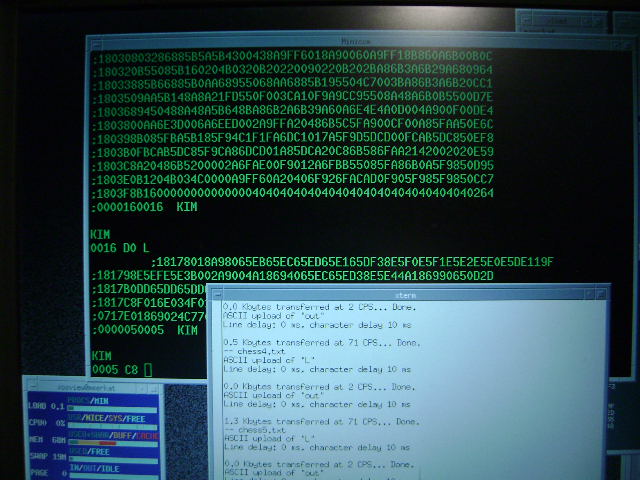
| The download screen: uKIM echos input in the green-text window, download script (bash) running in the b/w window. | |||||||||
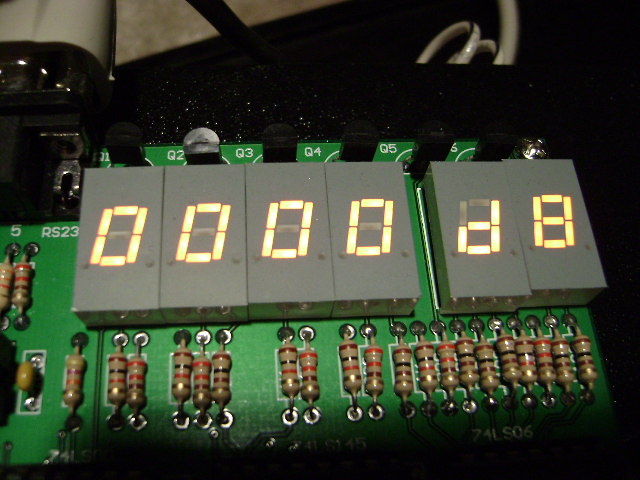
| Microchess's entry point is at 0x0000. Commands to run: C to reset board; PC to let the computer move; (from)(to)F to move a man on the player's move. (from) and (to) coordinates are given in Microchess's own notation, with A8 (white's lower right-hand square) 00, A7 01, B8 10, etc. Basically, A8 is 00 and then the first digit counts ranks, increasing toward the player, and the second counts files, increasing toward the player's right. Castling is realized by making two moves during the player's turn, capturing en passant by first moving the capturing pawn onto the captured pawn and then moving it to its final position. Microchess does not know about castling and en passant captures, and back in the day, users would either forgo making such moves themselves, or make them for the program when it seemed like a good idea. As Microchess does not verify correctness of any player moves, but simply begins a new search from whichever position it finds when its half of the move begins, this did not cause the program any confusion. | |||||||||
|
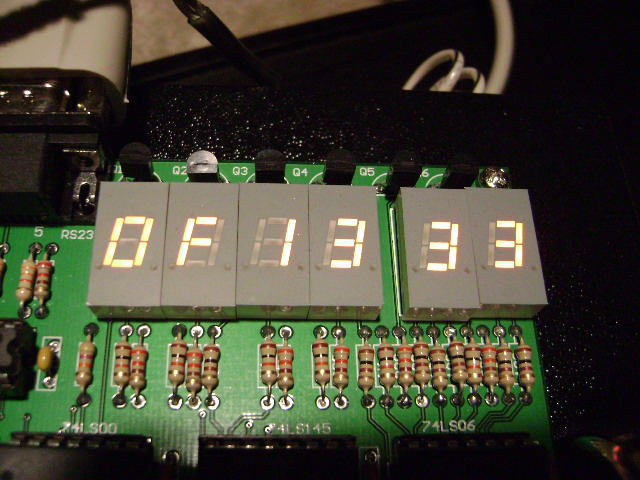
I hit PC. After some thought, Microchess replies:
KP; from E2; to E4!0F 13 33 | |||||||||
|
Le roi est mort.
To tell the truth, I cheated a little here. The final board position is a solved mate-in-three problem. Although the camera used to take these pictures is a modern Sony digicam, and the terminal is a late-90s Pentium-II, the chess program is still running on a 1MHz 6502, vintage 19ancient, set to a default average think-time of 100 seconds. In the several moves I played, I found Microchess to respond legally and plausibly to the current board position. It may have been a bit eager to take the available capture, but when I put it in check it replied quickly, indicating that it's got enough heuristics to prune the search tree to some extent. If this were any decent monster movie, the story would end with me battling, mano a uña, my Creation (which would, naturally, be Hideous). There would be a crane shot of me fending the thing off with the laboratory coat tree. If I had the good fortune to be a sympathetic-type character, I would have the presence of mind to blast the beastie with a fire extinguisher and so make my escape; otherwise, beastie-chow! It goes without saying that all electronic equipment, down to the laboratory iPod, would explode with lots of sparks, and the laboratory itself would go up in a raging fire. Sigh. Things are so much more fun in the movies. On the other hand, I guess the fire department might have another opinion. Going to put out yet another burning castle every time the resident mad scientist goes a-Tampering in God's Domain, would probably get mighty old, mighty fast. That's it. The uKIM is built. Next, I've got to get my hands on a cross-assembler. If I don't decide to build a kayak in my apartment or something next. I've almost got enough space, and there would be hack value in pulling it off... | |||||||||
Links and other implementations:
- Peter Jennings, who developed Microchess, describes his work. Note the hardware in the picture on this page. Mr. Jennings seems to be a software type: just enough structure to protect the KIM from static discharge and mechanical damage, and most of the effort put into software. The Microchess pages are worth a read as well. The program was originally distributed as a paper document; p.12 listed the 924 (of 1024 available) bytes that made up the program. These had to be entered into the keypad and then written out to tape. Later, a cassette tape with two copies of the program (analog medium, remember, prone to degradation) became available. For those who were too lazy to enter the hex themselves. The slackers.
- A C implementation of Microchess, runable on anything with a compiler (don't forget to specify -lm). It was written by a Bill Forster (any relation to Clayton?) of Wellington, NZ, and comes from Mr. Jennings's web site. This one sports advanced graphics: an ASCII representation of the chess board similar to that of GNU chess in non-xboard mode.
- A more hardware-intense implementation, by Hans Otten. This one was built into a case with a power supply, the KIM-1 board covered over for protection, and the expansion ports brought out to banana plugs on the top panel. The keypad and display were brought out into a pendant, to provide access to this method of I/O when the case was buttoned up. Looks like another copy of the bus lived on an internal backplane, and 1--4K RAM cards and an I/O card plugged into this. A couple of KIM-controlled cassette drives and a homebuilt terminal got glommed onto the box as well. Very nice!
- Hans Otten's Big Page of KIM Resources!
 TEH END.