Saturday, August 13, 2005
Almost Finished! And I mean it this time!!!
Rick built me the world's finest battery box:
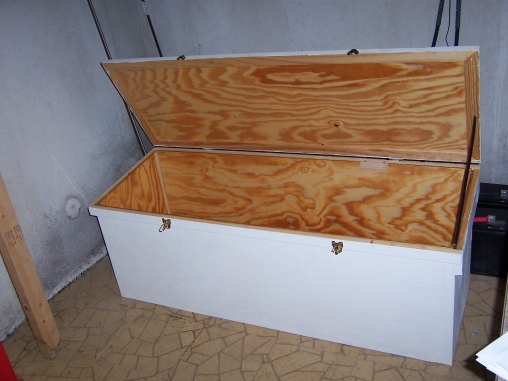
He brought it over Thursday evening, and we finished hooking it up last night (Friday). Quarter-inch plywood, reinforced where necessary, coated on the inside with an acid-resistant epoxy, and on the outside with white semi-gloss latex paint. The top slants towards the back to guide hydrogen gas to the vent at the back. Properly venting the hydrogen generated when the batteries are heavily charged (like during equalization) is the primary reason for a battery box. Protecting against accidental contact with battery acid or dropping something metal across battery terminals are other reasons why a battery box is needed. If I had been able to stay with the sealed batteries, a full box probably wouldn't have been needed, but a protective cover would have (ultimately up to the electrical inspector, who I'll be ready to call in another week or two, hopefully).
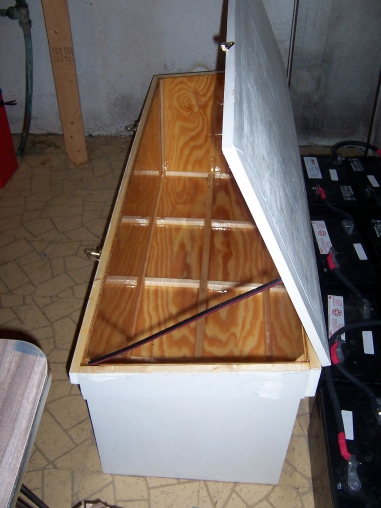
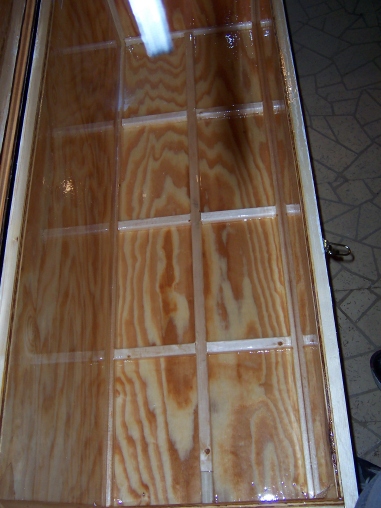
Rick put some nifty battery dividers in the bottom of the box:
The batteries in the box.
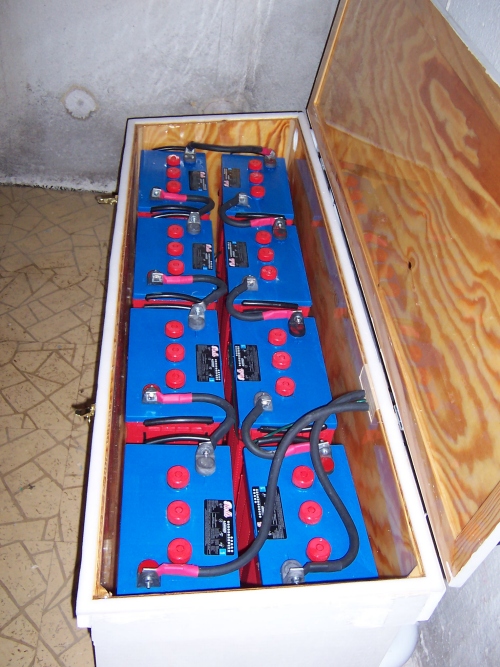
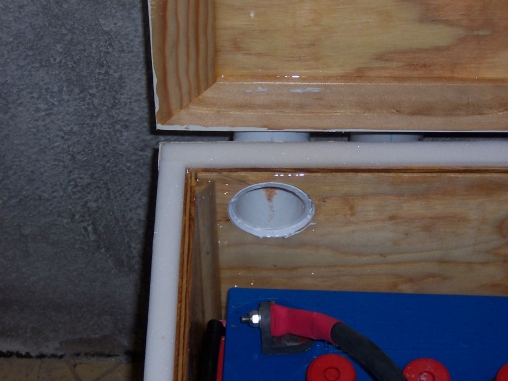
The exhaust vent can be seen in the back left of the box, and the holes where the cables come through in the upper right of the back:

At the bottom of the picture below is the fresh air intake for ventilating the battery box. A small 12-volt fan is in the fitting where the tubing enters the box. The fan is controlled by the inverter, and runs when the batteries are overcharged (60 volts on the nominal 48-volt system). This should only happen during battery equalization, a process run every few months to keep the batteries working properly. For normal operation, gravity should suffice to ventilate the box of any hydrogen generated.
The exhaust vent from the box:
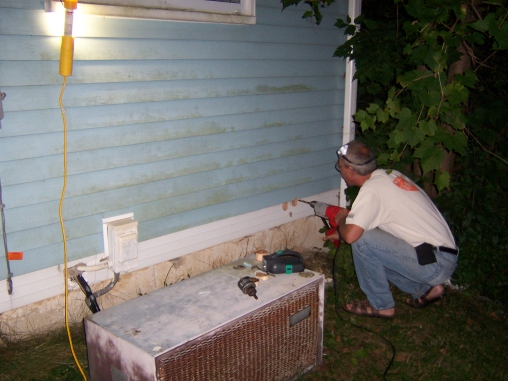
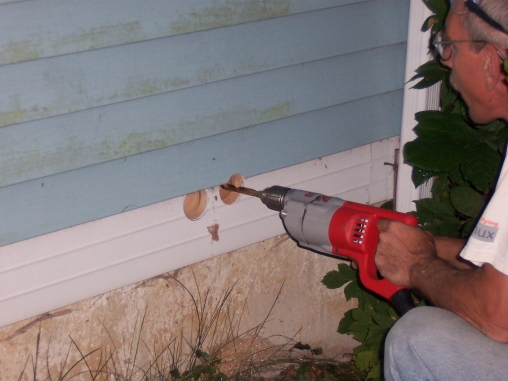
Of course, the vents have to go outside, so Rick drilled a couple of holes in the back of my house (this was about 10:30 pm last night):
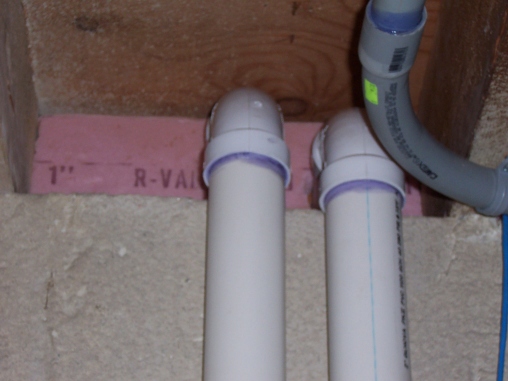
This is what it looks like from the inside:
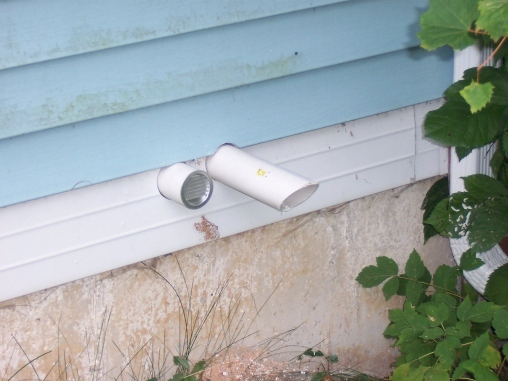
By the light of day, we see the vents in place. Rick intends to add a downward elbow on the intake (left) to keep rain out. A small ventcover is already in place. For the exhaust, he thought it was not a good idea to use a down elbow, since that could cause hydrogen to be trapped. Instead, he just cut the end at an angle. He'll add some window screen to keep the critters out.
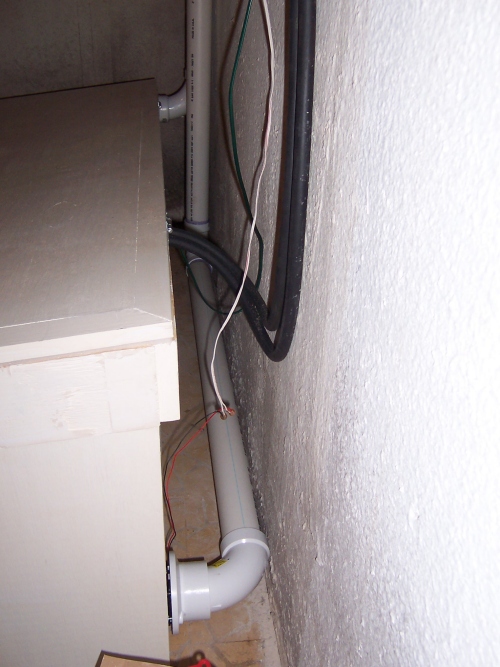
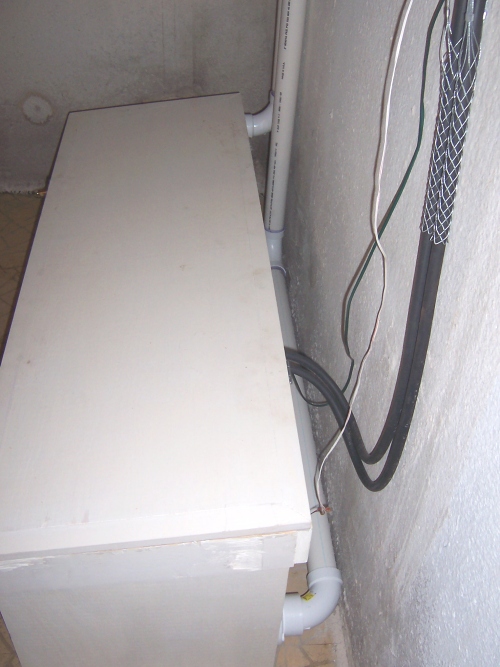
All of the connections to the box can be seen in the photo below. at the bottom, you see the air intake, the wires powering the 12-volt intake fan. The big black cables are the main battery cables, connecting the batteries to the Outback PS2DC box, which connects them (through breakers) to both the solar array and the inverter. The small black wires connect to a remote temperature sensor attached to one of the batteries inside the box. Maximum charging voltage varies with temperature, so the temperature sensor tells the rest of the system how hot (or cold) the batteries are. At the top, the exhaust pipe can be seen coming out of the back of the box and turning up behind the intake pipe.
With everything in place and connected, we can close the lid and let the batteries go to work!

We started running on them last evening while we were still finishing up--the power to drill the vent holes came from the batteries through the inverter, as well as all the lights. They ran the house without any complaint all through the night and well into a rainy morning, dropping only a tiny bit of voltage while I ran the dishwasher, washing machine, dehumidifier, and other things. This afternoon the sun has come out, so the batteries are being treated to their first taste of beautiful solar power!
Still to do: Finish covering up the shingle wires in the attic, and figure out a way to use a dump load. A dump load is a place to use excess solar power when the batteries are fully charged and the sun continues to shine. The ideal dump load is something that provides a needed service but doesn't really have to run at any particular time. My intention has been to use the dehumidifier in the summer and an electric space heater in the winter as my dump loads. But I asked Rick to look into the possibility of using X-10 home automation technology to control the dump load. X-10 sends signals through the house wiring to turn on and off lights and appliances. Radio Shack and others sell the equipment, including a variety of controllers--wall switches, remote controls, and computer interfaces. The Outback solar equipment has a means of generating a signal when dump-load conditions are met. If we can figure out how to turn this into an X-10 signal, I can then use any appliance or combination of appliances as the dump load by setting them to the appropriate X-10 channel.
One very interesting possibility for a dump load a few years from now might be a plug-in hybrid electric vehicle, or PHEV. This could make driving a car, at least for short distances, almost completely renewable--if you have a good source of renewable electricity handy. Which I do, on my roof!
He brought it over Thursday evening, and we finished hooking it up last night (Friday). Quarter-inch plywood, reinforced where necessary, coated on the inside with an acid-resistant epoxy, and on the outside with white semi-gloss latex paint. The top slants towards the back to guide hydrogen gas to the vent at the back. Properly venting the hydrogen generated when the batteries are heavily charged (like during equalization) is the primary reason for a battery box. Protecting against accidental contact with battery acid or dropping something metal across battery terminals are other reasons why a battery box is needed. If I had been able to stay with the sealed batteries, a full box probably wouldn't have been needed, but a protective cover would have (ultimately up to the electrical inspector, who I'll be ready to call in another week or two, hopefully).
Rick put some nifty battery dividers in the bottom of the box:
The batteries in the box.
The exhaust vent can be seen in the back left of the box, and the holes where the cables come through in the upper right of the back:
At the bottom of the picture below is the fresh air intake for ventilating the battery box. A small 12-volt fan is in the fitting where the tubing enters the box. The fan is controlled by the inverter, and runs when the batteries are overcharged (60 volts on the nominal 48-volt system). This should only happen during battery equalization, a process run every few months to keep the batteries working properly. For normal operation, gravity should suffice to ventilate the box of any hydrogen generated.
The exhaust vent from the box:
Of course, the vents have to go outside, so Rick drilled a couple of holes in the back of my house (this was about 10:30 pm last night):
This is what it looks like from the inside:
By the light of day, we see the vents in place. Rick intends to add a downward elbow on the intake (left) to keep rain out. A small ventcover is already in place. For the exhaust, he thought it was not a good idea to use a down elbow, since that could cause hydrogen to be trapped. Instead, he just cut the end at an angle. He'll add some window screen to keep the critters out.
All of the connections to the box can be seen in the photo below. at the bottom, you see the air intake, the wires powering the 12-volt intake fan. The big black cables are the main battery cables, connecting the batteries to the Outback PS2DC box, which connects them (through breakers) to both the solar array and the inverter. The small black wires connect to a remote temperature sensor attached to one of the batteries inside the box. Maximum charging voltage varies with temperature, so the temperature sensor tells the rest of the system how hot (or cold) the batteries are. At the top, the exhaust pipe can be seen coming out of the back of the box and turning up behind the intake pipe.
With everything in place and connected, we can close the lid and let the batteries go to work!
We started running on them last evening while we were still finishing up--the power to drill the vent holes came from the batteries through the inverter, as well as all the lights. They ran the house without any complaint all through the night and well into a rainy morning, dropping only a tiny bit of voltage while I ran the dishwasher, washing machine, dehumidifier, and other things. This afternoon the sun has come out, so the batteries are being treated to their first taste of beautiful solar power!
Still to do: Finish covering up the shingle wires in the attic, and figure out a way to use a dump load. A dump load is a place to use excess solar power when the batteries are fully charged and the sun continues to shine. The ideal dump load is something that provides a needed service but doesn't really have to run at any particular time. My intention has been to use the dehumidifier in the summer and an electric space heater in the winter as my dump loads. But I asked Rick to look into the possibility of using X-10 home automation technology to control the dump load. X-10 sends signals through the house wiring to turn on and off lights and appliances. Radio Shack and others sell the equipment, including a variety of controllers--wall switches, remote controls, and computer interfaces. The Outback solar equipment has a means of generating a signal when dump-load conditions are met. If we can figure out how to turn this into an X-10 signal, I can then use any appliance or combination of appliances as the dump load by setting them to the appropriate X-10 channel.
One very interesting possibility for a dump load a few years from now might be a plug-in hybrid electric vehicle, or PHEV. This could make driving a car, at least for short distances, almost completely renewable--if you have a good source of renewable electricity handy. Which I do, on my roof!
![]()